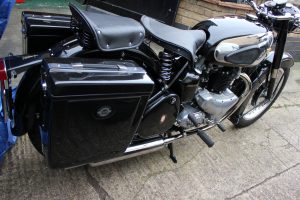
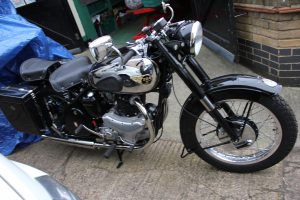
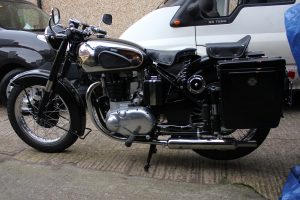
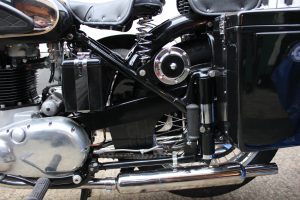
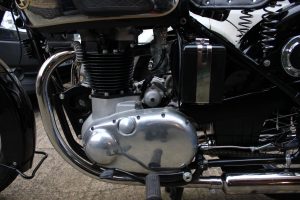
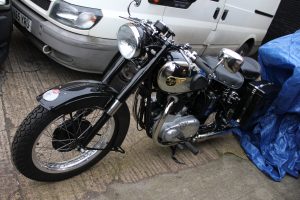
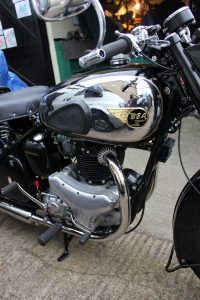
The BSA has spent its life in Switzerland and was delivered to the workshop in an amazingly un-mistreated condition.BSA A10’s are usually butchered or neglected in such a way that frame repairs due to corrosion need doing or engine parts need renewing rather then reconditioning.
It looked on strip down like most of the nuts and bolts hadn’t been touched by a spanner. All of the original paint was in place minus any primer finish as was the normal practice. Because this particular BSA A10 was in such original condition it was worthy to note that many of the nuts and bolts were finished in gold paint rather than being plated.
The petrol tank was beyond redemption due to corrosion in the chrome plated area of the tank. I have a good supplier of BSA tanks in India and they are pretty accurate in regards to the mounting brackets that need tweaking but the badge and rubber knee pad tapped holes are spot on. Petrol tap hole tapping are normally to the original sizes, IE 3/8th BSP rather than 1/4th BSP for the petrol taps that are normally available as an after market product. We have to make adaptors in brass to fit the aftermarket petrol taps.
Many petrol tanks from Indian suppliers have problems with them such as leaks in welded seams and badly fitted mounting brackets and petrol caps that crack the chrome finish when they are screwed up. Red oxide paint finishing is commonly found in petrol tanks internal faces, probably to hide a multitude of bad welds or rusty material. Remember that India has a rainy season that produces loads of moisture and condensation and that running a dehumidifier isn’t economical.
the tank is acceptable as an aftermarket product with a price to match. The rest of the tin work such as mudguards can easily be restored as they are a good gauge thickness thus rust holes or equipment mounting holes can be braze filled with little distortion to the tin ware.
Claude who owns the motorcycle gave me a photograph of a bike, basically black with alloy wheels. I thought, “hay ho”, he’s going to make it as BSA should have done in its hayday. My orders where to use stainless steel components wherever thought needed them and to bring electrical ignition system up to 12 volts and use LED’s for the lighting if possible.
It was nice to see a set of aluminium wheel rims and stainless steel spokes come through the post from “Hagons Wheels” for me to build. Claude knows exactly what he wants as he gave me a photo or another BSA A10 that he had seen at a classis bike run or show that set the seeds of thought in his mind on how he wanted the bike to look like.
The engines are fairly basic to work on but be carful to follow the service manual as you can meet a few pitfalls such as shoehorning the motor out of it’s close fitting cradle and what to remove from the bike before it can be taken out.
Workshop manuals such as Hanes can be a bit confusing because one manual may cover several models and may not give very clear instruction on particular components such as the clutch. We have built so many of these engines that the use of a manual is never needed.
The engine was stripped down so as to check all parts for were and what was needed for updating the odd component. In fact there are very few components made that would make the engine any better. SRM supply some stainless steel parts and different sump plate. throughout the whole machine the major update would be electronic ignition and a 12 Volt Alton dynamo. When rebuilding the engine it is imperative the gaskets are handled and fitted carefully to avoid oil leaks. Modern gaskets seem to be made from less resilient materials. If all has been fitted together properly the only oil leak you may find would be from the push on rubber tubes from the oil tank to oil pump.
I always like the frame to be full gloss powder coated as it is so resilient and not so prone to chipping or flaking when nuts and bolts are fitted. So many purists come into my factory and ask, “what is the paint finish on that bike”. I may say enamel when it has been power coated or I may say it has been powder coated when its enamelled. I haven’t had a customer who has noticed the difference. When powder coating is noticed is when it is sprayed on thin metal components like mudguards, engine plates and petrol tanks. Powder coating gives a thicker layer of paint that is good on some poor frames because it can hide imperfections such as braze and pitting by giving a smooth layer of paint over the top. Things to be aware of when powder coating is oil tanks and the threaded orifices that emanate from the tank. Frames and fittings with holes in them such as engine plate mounting studs and screw holes. Painters usually black thread holes off but don’t completely mask threads off. When you receive a powder coated frame it will need holes reaming out and threaded holes will need tapping out if you want to void difficulties in fitting. Typically a bolt fitted into the untapped hole will graunch to a halt no matter how much grease is applied. Also watch out for headlamp shells being powder coated as this will effect a tight headlamp rim that will be difficult to fit without butchering the paint finish with a file.
“anyway back to basics with the rebuild”, SRM do a neat ignition system that fits into the Lucus K2F magneto if you take some of it’s guts out, it leaves everything looking untouched and original. The dynamo can be rewound for 12 volt but Claude wanted to fit something more modern so he ordered an Alton dynamo that slots into place of the old Lucua dynamo with no modifications.A common mistake to make is to fit the completed engine into the frame and bolt it all up to find you haven’t fitted the dynamo strap. If forgot you will have to remove a lot of stuff off the timing side just get the strap retaining bolt into situ. There is no easy way around this problem unless you do a bodge job of taking the timing cover off and drilling an access hole in the rear timing cover. I have seen this plenty of times on BSA A10S and BSA A7s that have gone through an engine out job at home.
Just to side step a little, If your rear sprocket is worn and hooked you won’t have to wait a lift-time to find one as it is reparable. The sprocket is an integral part of the rear brake drum. The teeth can be machined away on a lathe so as to leave a plain flange to bolt a new sprocket ring on. There is not much I can say about standard rebuilds or restorations as the model engine is so well covered through hundreds of write up’s.
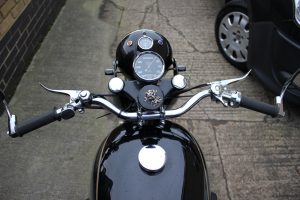
Claude wanted indicators and three micky mouse lights fitted in the head light shell, one to show indicators and the others for high and low beam. The headlamp shell was not designed to take so many wires, but with carful planning more than enough room was available. Micky mouse lights have to be carefully planned in there layout as the back of the headlight glass may clash with there bodies. The indicator micky mouse light needs diodes fitted to its feed wire so as not to produce a hazard warning light effect with all the indicators flashing at the same time. The headlight also comfortably accepted the indicator replay box.
Claude ordered some craven pannier boxes that I dreaded fitting. I have fitted many pannier boxes and top boxes to loads of old bikes and they are generally a pain in the arse. They need custom frames and fittings making. Most panniers are not accurate mirror image so are difficult to get looking right and even. Surprisingly the cravens weren’t to difficult to fit and some of the stainless steel brackets were usable that were supplied with the panniers. Craven panniers are very accurate making custom fitting that little bit easier at least on a 1950 BSA A10.
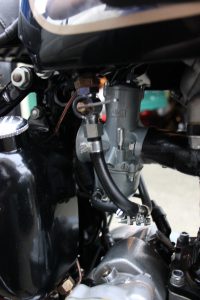
All dressed in black with aluminium rims and stainless steel spokes, electronic ignition system, LED lights, Alton dynamo and an Amal mono block carburettor that can be tricky to fit as well as the panniers, I think she looks great and well balanced. There is a line to be drawn when one has to decide whether to restore or replace certain items such as the exhaust system or the riders and passenger seats. Exhaust systems are as good as they are going to be, that’s as long as you don’t buy the cheapest. The aftermarket seats are so cheap that it is worth getting them recovered in better material as Claude wanted to. I admit they do look better and have that hand made signature attached to them. Here is a list of the parts purchased from the makers and suppliers to produce this lovely BSA A10 1950 Vintage.
- 1950 BSA A10 Golden Flash
- DragonFly Motorcycles
Levers
Rubbers
Chain guards
- Montys classic motorcycles
Alloy sump plate
- SRM
Electronic ignition kit
K2F twin magnetos
DVR2 negative earth 6V or 12V
- Bth components LTD
Alton BSA dynamo
- Hagons
Flangless alloy rims
1921540TC
1825040TC

