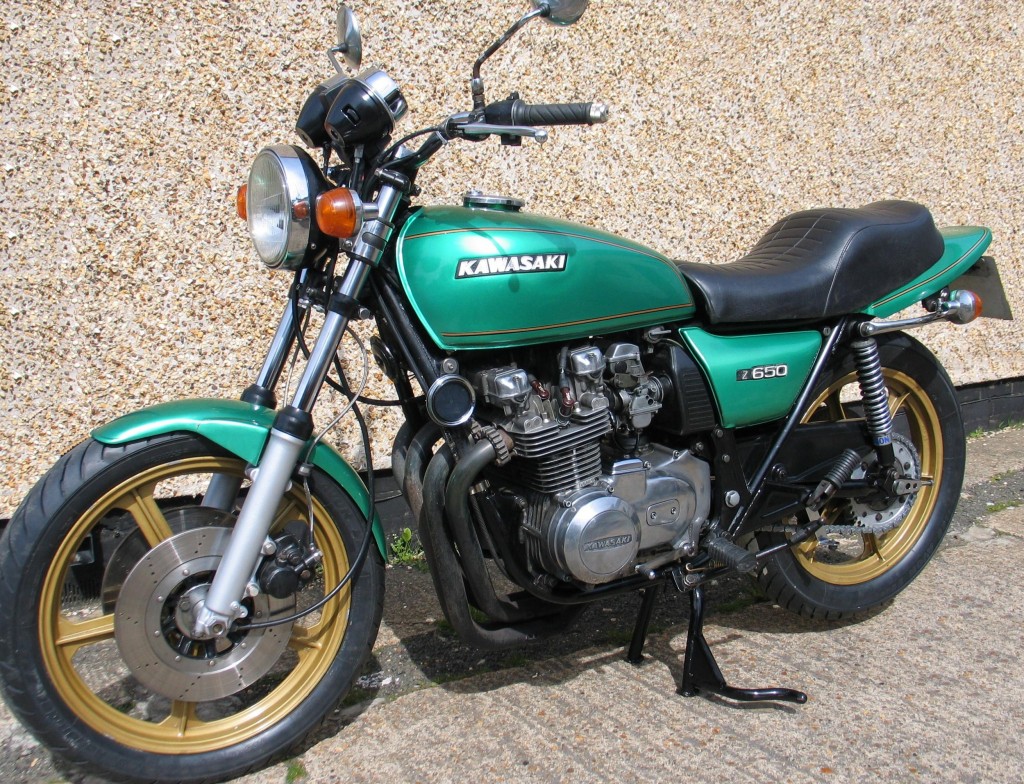
The finished Kawasaki Z650
Here at Stotfold Engineering we don’t just work on pristine bikes. We work on many bikes that have had a hard life and are in need of bringing back to a good working standard. This one of our customers bikes. He had bought it after it had been off the road for a number of years. He required it to be roadworthy again and pass an MOT. My first assessment established the head-races were notchy and tyres needed replacing.
Once at the workshop I was having trouble getting it on the main-stand, so I got the bike on the bench and had a look. The main-stand pivot bolt was badly worn and main-stand itself needed welding. The main drive chain was examined and found to have a worn small sprocket, essentially developing a hooked shape. Further examination found the retaining nut was loose and after removing the rear sprocket it was found the cush drive rubbers were completely shot. In fact they were home made rubbers and not made of the correct grade of rubber. The nearly inch of play on the cush drive and the loose sprocket did not do the chain any favours. The aftermarket rear ‘Brembo’ brake was removed and stripped as it was seized solid. The rear light and indicators also need fixing. That was basically it for the back end or so I thought. I decided to fix the rear end first before doing the front.
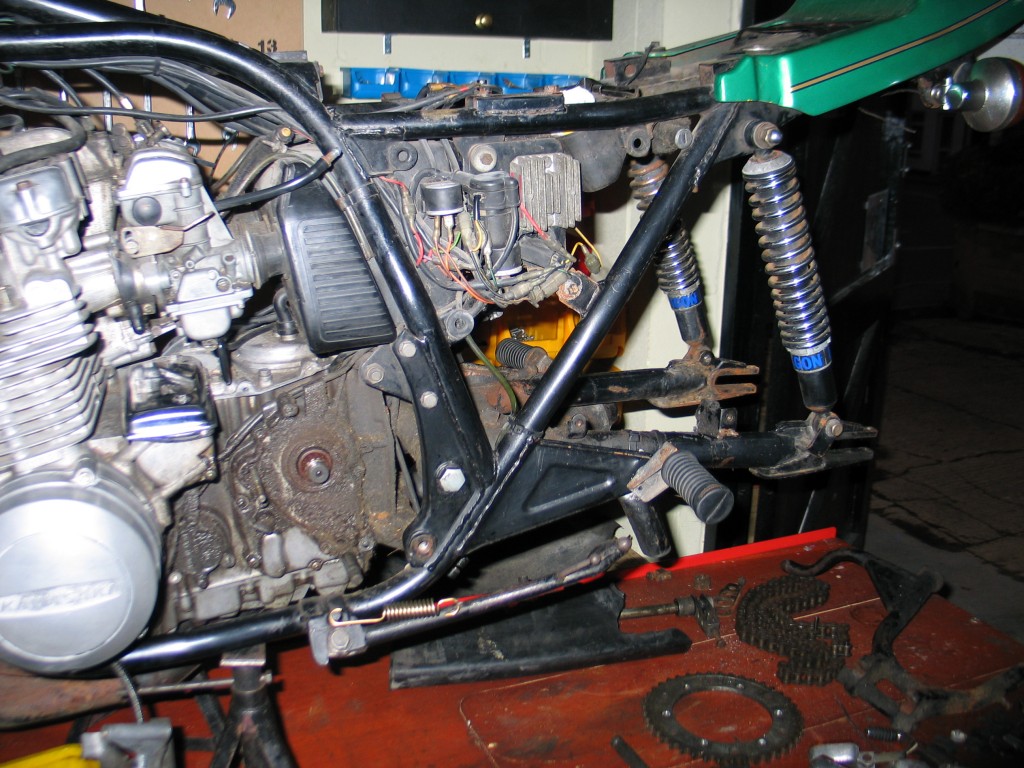
1. Kawasaki Z650 rear end stripped for inspection. Not a pretty sight, but it all structurally good.
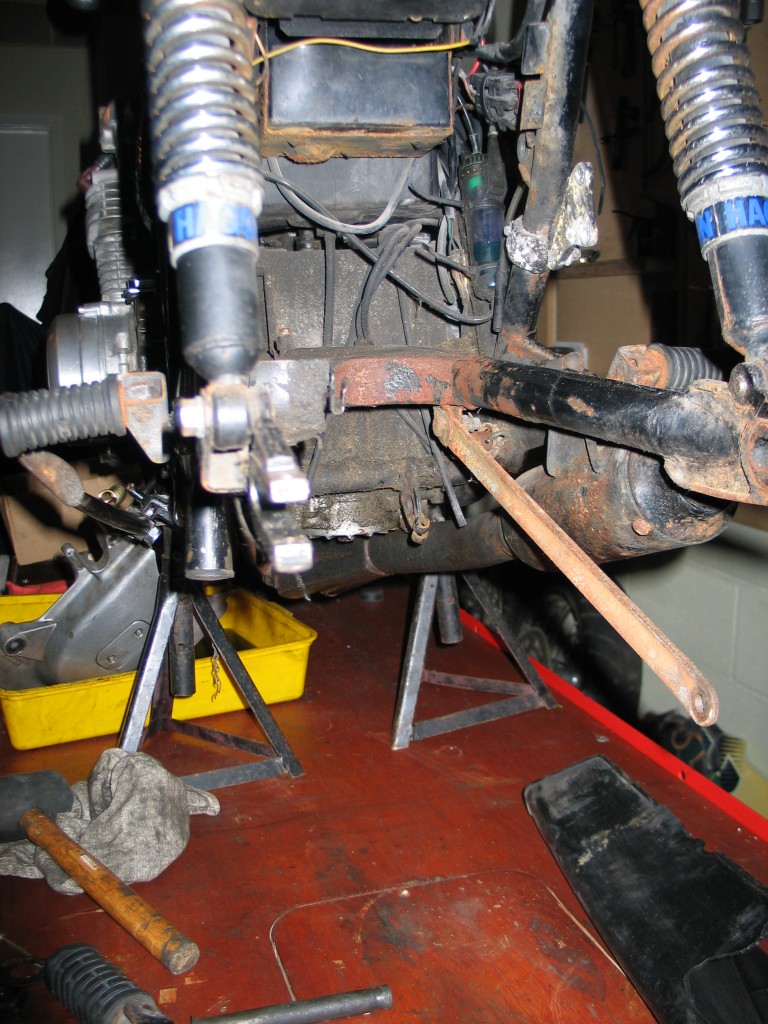
2. Rusty swinging arm, torc arm and a lot of crud
First things first. Clean the crap off ; years of chain lube mixed with road dirt. I did this with a paint brush an paraffin. Simply place a tray underneath and keep sploshing the paraffin on. I don’t bother with any of the fancy degreasers as paraffin is cheap and doesn’t harm the components. A few hours later and it was looking pretty clean. I decided the swinging arm, torc arm and main stand were just too rusty, so once Terry had welded some more meat on the main stand I took them to ‘Full Range Finishes’ to have them painted.
Because the main stand was to hard to use , the side stand had taken a beating. The main mount on the side stand was splayed out. I compressed it back into its proper shape and fitted a new stronger spring. The cush drive rubbers, that were home made things, were replaced with ones I fabricated from the correct grade of rubber. I then fitted a new tyre to the back-wheel and a new chain & sprockets was also fitted. Some investigation of the tail light wiring found it to be in a poor state, so whilst fitting the rear indicators I replaced the wiring and connectors.
The rear brake was proving very difficult to bleed. The Brembo master cylinder was the problem. It was full of crap and I decided not to waste time by stripping it and replacing seals. It was more cost effective to replace the whole cylinder with a ‘Gremica’ one. It was modified to fit behind the side panel. New linkages were made to the brake pedal. An hydraulic brake light switch was installed instead of the mechanical one. The electrics were also tidied up for a neat finish behind the side panel.
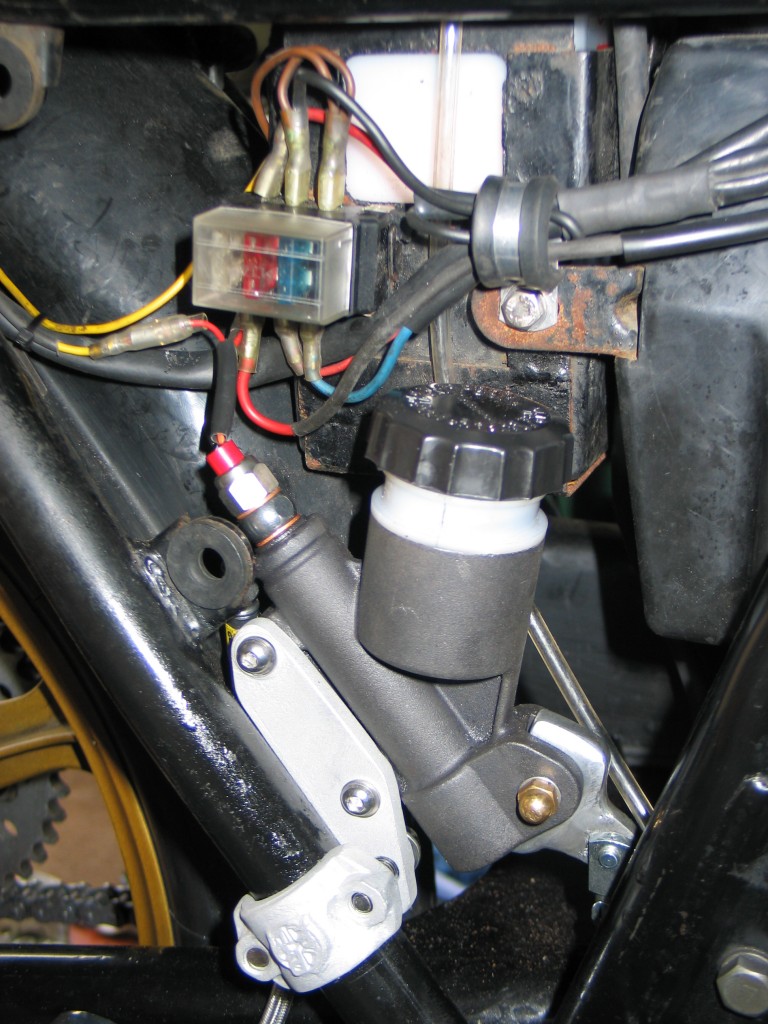
3. The new master cylinder installed tidied up electrics
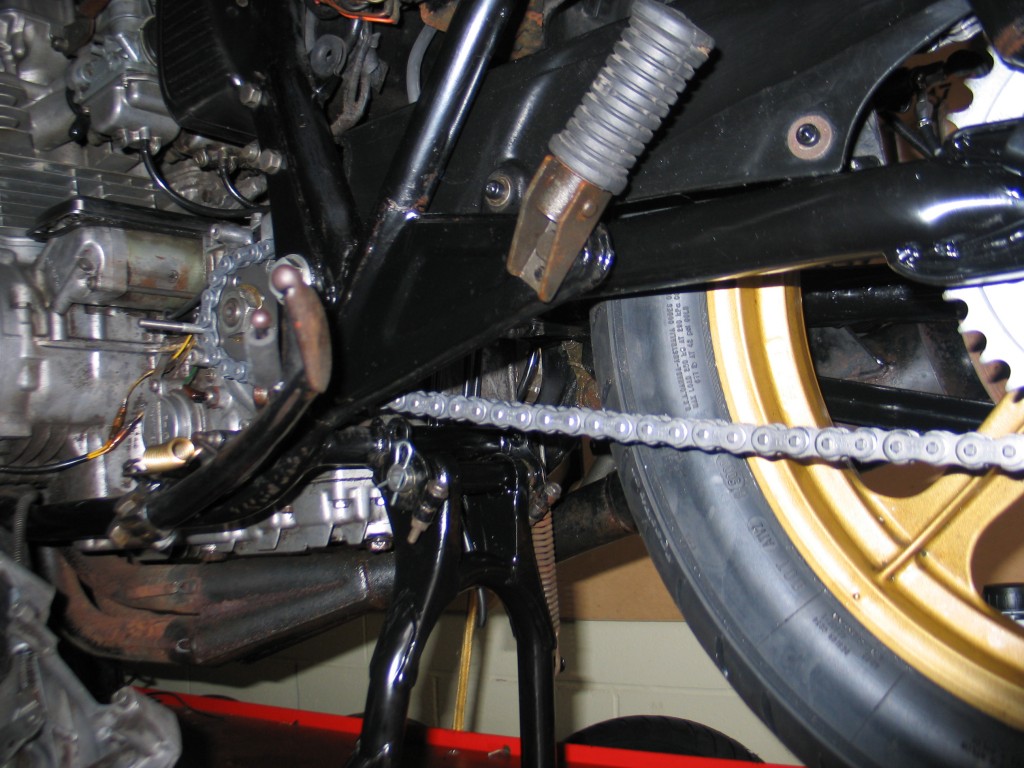
4. Main stand repaired and repainted
The next stop was the front end. Once I had stripped it I discovered two additional problems that would need to be addressed. One of the forks seals had blown and the plastic front mudguard was cracked on its mountings. The plastic mudguard needed to be re-enforced as it is not as rigid as the original chrome one. If you are going to fit a plastic mudguard to your bike ensure it has a brace, as the forks will want to twist under load. You will notice that in more modern bikes a re-enforcing plate is fitted to the plastic mudguard as standard for this very reason.
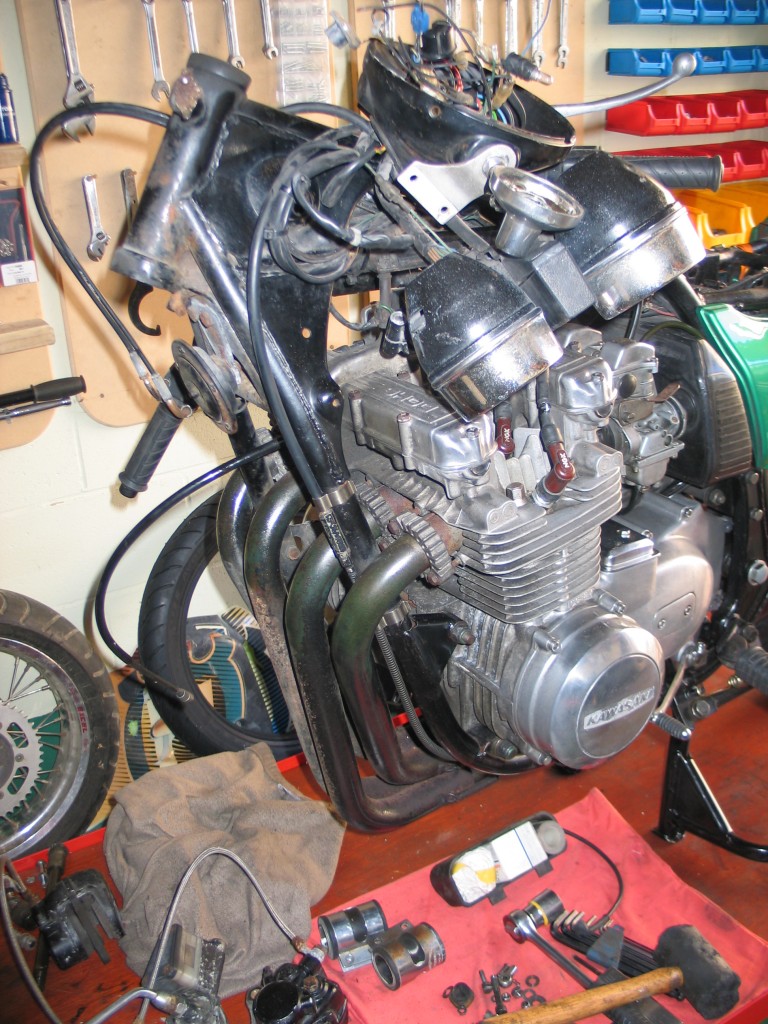
5. The front end is removed for refurbishment
The forks were both stripped and cleaned. The fork oil had not been changed for a long time by the look of the oil. Both fork seals were replaced even though only one had blown. It’s not worth doing just the one whilst both forks are out. Cosmetically the forks did not look good. The factory finish on the sliders was lacquered polished alloy. Unfortunately this coating does not not last forever, and the position where forks are inevitably lead to stone chips in the lacquer. Once corrosion takes its toll on the exposed alloy the whole thing looks a mess. I decided now was the time to improve the looks. I aqua-blasted the remaining old lacquer off and cleaned the sliders thoroughly. The sliders were then painted silver and lacquered. This gives a clean hassle free finish which should last a good few years.
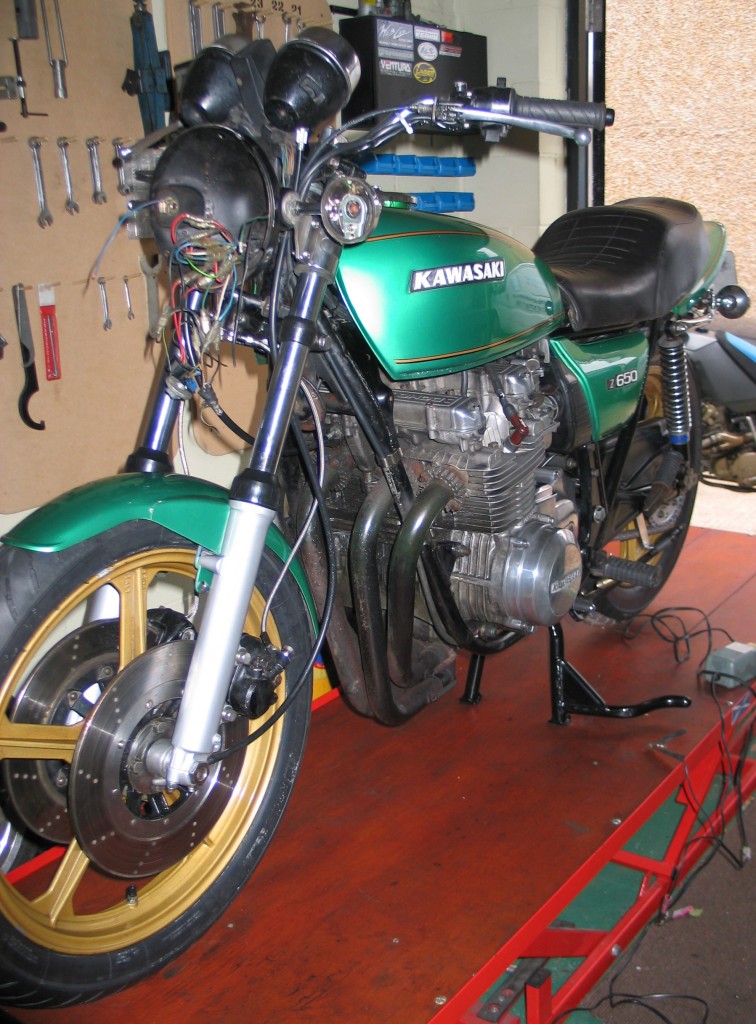
6. The front end is re-instated. A few jobs still to do.
The old steering head races were removed. These can be tricky to remove sometimes as it is hard to get a drift behind the bearing cups. These were no exception. In the end I had to cut the bottom bearing cup in half with the precision grinder. The new tapered bearings were installed and the yoke cleaned and refitted. When adjusting the head-races firstly pre-tighten the bearings loosely with a ‘C’ spanner and once the forks and wheel are in tighten again, so that the yokes turn easily with the weight of the wheel. Do not go mad they only have to be hand tight. Check the forks for play in the head stock; loosen the yoke bolts and tighten a little more if needed. It is important not to over tighten the head-races as this produces a bad rolling effect in the bikes steering and very poor handling characteristics.
At this stage I decided to inspect the front brakes. The fluid was like old engine oil, so I decided the best policy was a strip down and clean. I repainted the master cylinder once reassembled. The top brake hose was slightly damaged and the lower ones were very rusty, so new hoses were fitted. That was the front end finished. The oil and filter were changed. The air filter and plugs were checked and found to be in serviceable condition. Initially the bike would not start, so I checked for petrol and a spark. There was petrol in the bores, but the spark was weak and erratic. The condensers and points were replaced. Bingo! she runs sweet. A good polish and the bike was ready for MOT.
WHAT TO LOOK OUT FOR IF YOU ARE PLANNING TO RESTORE A BIKE TO ROADWORTHY CONDITION.
This bike had all the classic signs of a motorcycle that had been heavily used with no regular maintenance. If you are buying a bike like this bear in mind how much you will have to spend to have it roadworthy. Here are the most common wear points on a bike:
-
Tyres – are they worn out or perished? In this example the latter.
-
Brakes – are they seized, not working or are the pads worn out? All of these applied to this bike.
-
Steering – is it notchy or knocking requiring new bearings? Notchy in our case.
-
Forks – are the seals leaking and if so are the stanchions rusty? If they are rusty new seals will not do. You will have to replace the stanchions or re-chrome them. One seal had blown on our bike.
-
Drive chain – check the sprockets for hooking on the teeth and does the rear wheel spin smoothly with no grinding sounds? The chain on our bike had a tight spot and the small sprocket was hooked.
Obviously all of the above parts of a motorcycle are parts which are take the heaviest wear, but take these costs into account before thinking you can get a bike on the road cheaply. It may not be as cost effective as you think. Some of the Z650 refurbishment was done for cosmetic reasons, but it was just cost effective to have some of it done while the components were apart, like the swinging arm and fork sliders. It is also unlikely you will see all the faults at once. Often you don’t find them until you have stripped the components down, so allow yourself a little extra cost for hidden dangers. It is often the case with restorations that the cost out strips the value of the bike, but you must decide how much you want the bike, how perfect you want it and whether you want to do a complete restoration in one hit or do it over a number of years, riding the bike in between. I have done both in the past. My Honda 750 four cafe racer, shown here in the blog is being done from scratch. My Norton Commando on the other hand was done over a number of years, each year improving and restoring a different part of it. The latter has the obvious advantage of keeping the spending down, so not one big bill and being able to ride the bike. Always remember a bike is for riding and not wheeling out of the back of a van at shows.
By Colin Jones

i am happy to find it thanks for sharing it here. Nice work.
thank! for this news it’s a good infomation !
I’ve already bookmark this article and will definitely refer this article to all my close friends and colleagues. Thanks for posting!
Thanks for posting! I really enjoyed the report. I’ve already bookmark
this article.
This is great
wonderful share, great article, very usefull for me…thanks
Pingback: 行動電源