Also you can click the link to download in PDF.
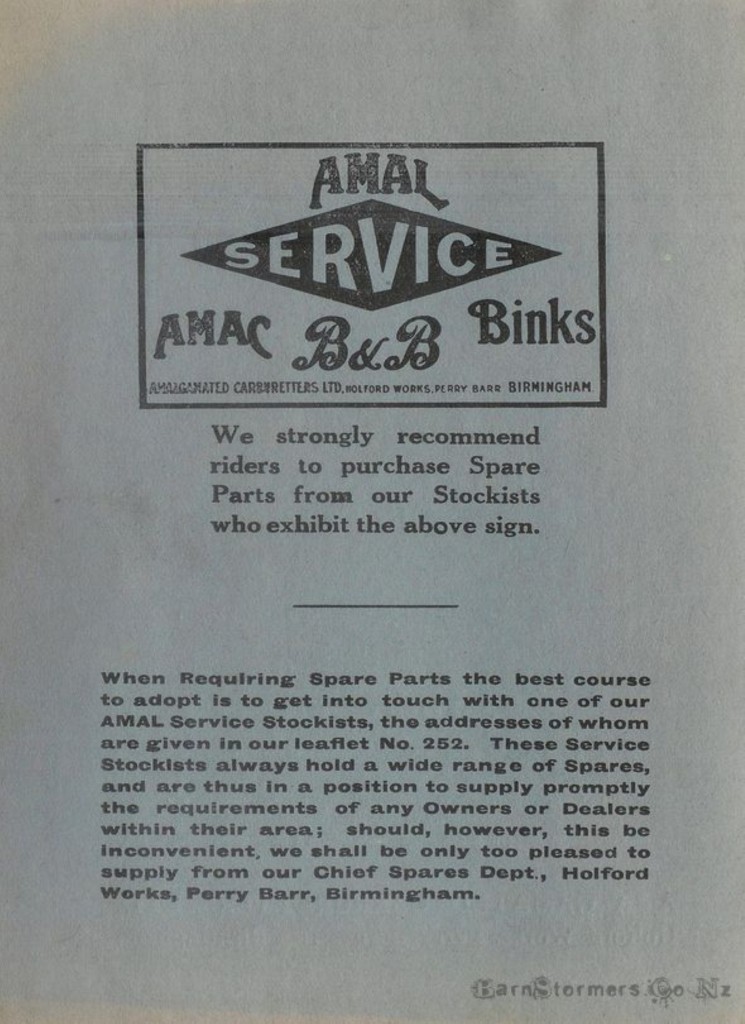
Amal Carburettor parts list.pdf
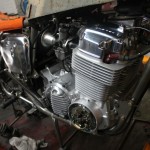
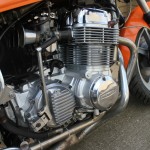
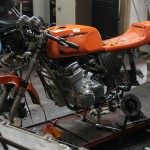
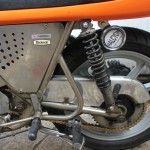
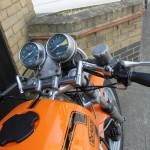
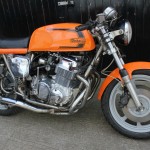
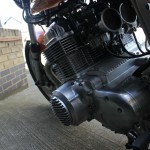
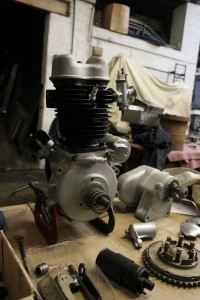
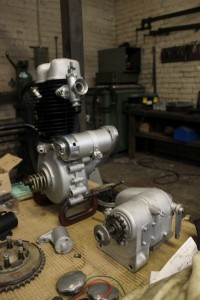
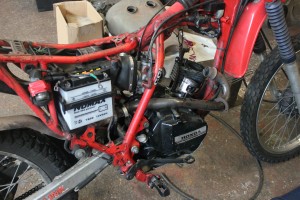
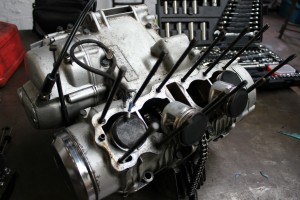
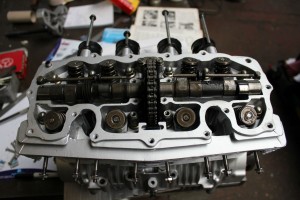
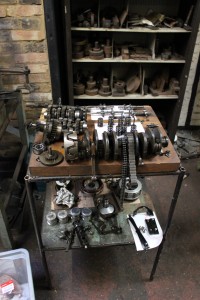
This particular Rickman Honda had been laid up for several years before it was given to us for an engine overhaul. We have rebuilt only a few Rickman Hondas in the past 20 years.
The name Rickman enticed the purchaser to believe the engine had been upgraded in some way to give Rickman performance, not so, as the 750cc Honda power units are bog standard but many riders of these machines therefore gave them more throttle so that Rickman Honda engines after a strip down commonly show stretched and worn chains plus worn chain guides.
Piston rings sometimes break after fluttering up and down in the grooves. This particular machine did not have a hard life although all of the above problems had occurred accept that all of the top compression rings had broken up but had not worn there ring grooves in the piston. The barrels where in excellent condition with no scoring and only showing .001 thousandths of an inch wear. All that was needed was a light honing. The motor itself was in excellent condition. The gears, selectors and dogs showed literally no wear as they are always bullet proof as gear selection is so positive that few mistakes can be made.
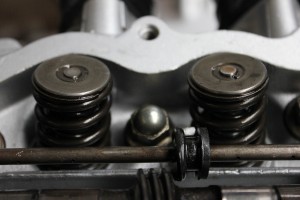
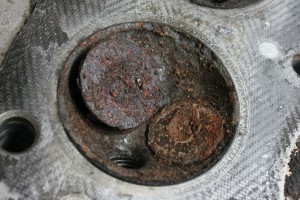
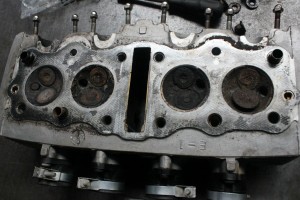
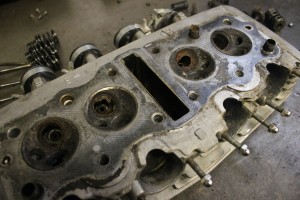
Plenty of revving on these machines does cause some valve seat damage if the top end runs a little lean and hot, this bike showed a little wear on the actual valves themselves but not on the seats. The top of the pistons were black soft carbon but underneath this layer was diamond hard brittle biscuit coloured carbon showing it had run a little bit on the lean side and when the owner said it had started first time after being laid up for 6 years the carbs laid on a soft fluffy but oily layer of black carbon.
On draining the sump of oil it was found to be about 50 percent petrol, good and thin enough to run a two stroke on. Hmmm! Petrol taps leaking or left on during its 6 year retirement. The taps were tested, no leaks. Petrol taps left on! Good job the owner didn’t run it for long, for it was acting as flushing oil, and boy did it do its job on the engine strip down. As all was very clean allowing us to check all working internal parts for wear.
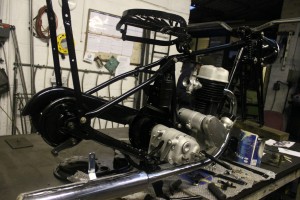
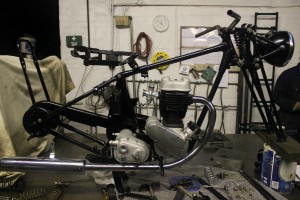
The Rickman frames have a top tube that allows one not to battle or lay the whole bike on its side to put over the engine that lies on its side precariously on the rag covered floor. Although it takes 3 reasonably strong persons to lift the engine into its cradle, it’s not difficult although it looks daunting as these big 750’s do pack some compact weight. Don’t even try to put any 4 cylinder Honda in it’s frame with the bulbous finned oil filter housing protruding from the lower front of the engine, it wont go.
Another bug bear is the closeness of the inlet and return oil feed unions into the bottom right hand side of the engine. Bare this in mind, as if you were to tighten all of the main engine to frame bolts and then plug the oil pipe fitting into there requisite housings amounting to two, you may get some problems. Leave all the bolts loose and then jostle the engine around so as to locate the two big oil pipe unions into there housings. If you follow this order you will save about an hour of hassle in undoing bolts and retightening them. This engine refused defiantly to be removed from her harnessing cradle due to the dreaded long front engine bolt that always seems to bond with the crank case apertures that it passes through, 3 hours of manual drilling with the pistol drill will free it up, but mind how you hold the drill in line with the bolt or you may find your self drifting into the aluminium cases.
Other typical difficulties to remove bolts or studs are found on the header pipes going into the head. Studs with brass nuts would have been a goog idea but Honda stuck with steel studs that had to have there steel rust bonded nuts welded by iron oxide removed. A receipt for a selection of short broken studs. Removing old manifold or header pipe bolts would strip the threads out of the cylinder head. In both cases they would have to be expertly drilled out.
A not so common problem is stripped spark plug threads even though we had to deal with one on this Rickman Honda. When plugs are removed and replaced the packing washer flattens and provokes over tightening. The thread length of Honda 4’s plugs will allow a reasonable good compression seal with very light tightening.
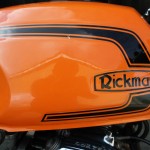
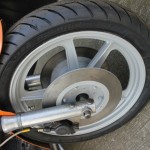
A common dilemma is to cross thread the number 2 and 3 plug holes as the plugs are quite difficult to locate. The petrol tank on this bike when undressed looks rather rustic and 2nd world “warish”. But dressed in its canopy of orange Rickman fibre glass it looks good and balanced with its matching seat. When I initially took on this project the owner gave me a list of what was wanted and I said 2 weeks but on meeting with him, he put some added extras such as brakes needing attention and fork yokes needed changing and modifying and wheels wanted painting silver as well as electrical handlebar switches and such needed changing and modifying.
I thought I would use this project to show collaboration between customer, supplier of parts and builder. After stripping the engine and assessing what parts were needed I contacted the customer and told him what parts were required within 24 hours David silver Honda spares delivered on time just after we had vapour blasted the cases, barrels, head and polished the various covers.
Due to the customers fast contact and placement of order from David silver there was no halt in the engine rebuild. While the engine was being put together the wheels were taken to my brothers to be silver sprayed in 2 pack as I needed them back fast so I could skim the chronically rusted and pitted discs and then after this the front and back brakes A P Lockhead would need bleeding which can be quite awkward to do. The aftermarket handlebar switch gear has wire colours that didn’t match existing colour codes, we will have to buzz these out and figure out where the coloured wires go.
Difficulties can occur when working on a standard wiring loom that has been messed about with, IE cut wires changing colours from say dark green to light green. After inspecting and gentle tugging and picking at terminal connections and component connections the weak spots come to light and can be repaired. This is cost affective as a full rewire and component replacement would be in the order between £700 to £1000 opposed to £200 to £500 for a good reliable fix.
The wheels came back after 3 days the disk now needed to be refaced which I will do on our big lathe, they need to have a minimal amount of metal removed so as not to make then thin. One of the front brakes callipers has had its hydraulic line feed nipple broken in it. Careful and judicious drilling will remove it without disturbing the thread.
Difficulties can occur when working on a standard wiring loom that has been messed about with, IE cut wires changing colour from say dark green to light green. After inspecting and gentle tugging and picking at terminal connections the weak spots come to light and can be repaired. This is cost affective as a full rewire and component replacement as this would be in the order of between £700 to £1000. as opposed to £200 to £500 for a good reliable fix.
The wheel came back after3 days, the discs now needed to be refaced which I will do on our big lathe. They need to have a minimal amount of metal removed so as not to make them thin. One of the front break callipers has had its hydraulic line feed nipple broken in it. Careful and judicious drilling will remove it without disturbing the threads. The engine was put into its cradle and all bolts tightened up. Time to adjust rear chain. Hidden in the swing arm pivot bolt end are round cam plates with offset holes.
By turning the cam-plates, chain tension should be attained, if not, a different set of cam-plates will have to be used. There are several sets of these plates to choose from. Everything has now been completed and its time to start her up. The usual procedure is common for any four cylinder Honda but on this one, with no airbox, more choke will be needed until the engine has really warmed up, probably about one minute. The engine started first time and was incredibly quiet unlike the exhaust volume. One other very important matter to bare in mind is “never leave the petrol taps on when the Rickman is on its side stand. Standard side stands on the Rickman are on the short side, thus allowing the bike to lean alarmingly over, carb floats will not work effectively in shutting off fuel flow.
This is a list that we gave to the customer of the machine repairs.
Engine
- 1) Remove engine (Had to drill out 4 bolts). Full strip down and inspection to certain worn parts (Parts supplied by you) Hone barrel.
- 2) Repair stripped threads in cylinder head.
- 3) Helicoil 2 off plug threads (No 2 and No 3)
- 4) Manufacture 4 off engine mounting bolts.
- 5) Repair wire to oil pressure sensor and neutral gear.
- 6) Repair stripper thread in exhaust.
- 7) Repair stripped tread in cam shaft covers.
- 8) Repair stripped tread in cam shaft cover breather. vapour blast and poish cases and covers. Grind valves in ( 2 very worn) but very serviceable.
- 9) Supply oil to spec.
Wheel
- 10) Remove tyres, tubes , tapes and all fittings, shotblast wheel and paint grey silver.
- 11) Replace 2 off inner tubes (rear creased and surface fractured).
- 12) Manufacture rear wheel spacers as home made ones were fitted.
- 13) Remanufacture rear chain adjuster. fit link-less chain.
- 14) front wheel spindle ( repair damaged thread).
- 15) machine all disks (very rusty and pitted)
Breaks
- 16) Fix seized rear break calliper.
- 17) Remove front break calliper ( strip down and clean all parts, great difficulty in removing piston.
- 18) The 2 callipers had stripped bleed nipple threads. One calliper had stripped bleed thread. Modify bleed nipple thread to take oversize nipple (SPecial stainless insert made for one)
- 19) Remove and clean hydraulic lines( bad blockage ound on throttle side line). Strip down master cylinder and check master seals. Replace lever bolt for stainless steel. bleed front breakes.
- 20) Supply break fluid.
The customer picked up the bike and said he was going to pick it up and take it for 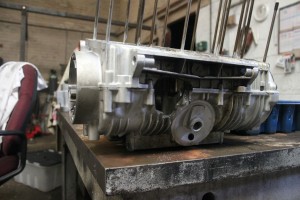 a ride to his home country of Wales next week. I said she will give you no problem as long as you turn your petrol tap off, if left on the side stand. Two weeks later I got a phone call saying the engine had catastrophically blow up leaving a large hole in the crank case, “what do you think has happened?” he asked, I said “take the oil tank cap off and tell me what you can smell”, “petrol” he replied. did you at any point leave the tap on
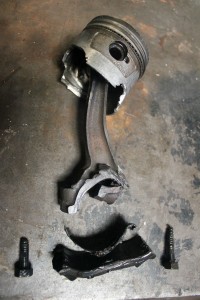 over night, “yes” he said.
Within no time he had provided two pairs of cases and a knackered rusty crank equipment with con rods and some just as bad and grotty barrels. I didn’t really want to rebuild her until my mate Colin said “I have got a new crank with rods fitted. “so here we go”, the rebuild of a rebuild is on. The cases were parted and the crankshaft was removed and the remnants of a conrod were found.
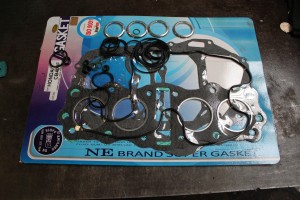
The crank was actually bent, first time I have ever seen this in any 4 cylinder. The barrel he provided had one good liner so we pressed it out and fitted it to the old barrel and then we honed the surface rust from it. It was as good as new. After a massive blow up it is a good idea to check that the valves are sealing. Only one exhaust valve was bent, Colin had a fine used one with no ware on the stem. A pressure test on the head showed great sealing qualities. No other damage was found. I thought it a good idea to replace the timing chain that had stretched beyond belief. A new gasket set was fitted that was delivered in lightning time by david silver spares. Within 4 days of strip down she was as good as new.
Picture
Triumph motorcycles seemed to have got everything sorted out when they introduced the 1970 triumph TR6. They are a joy to work on and a particularly good starting point for a novice engine builder, in that they are simple in construction with the unit construction gear box and no fiddly parts. The most awkward part is usually the sludge trap in the crank.
The blanking plug can be drilled with a 3/8 inch hole right through and a tapered metal working chisel can be hammered into the drilled hole and an adjustable spanner turns it. It is guaranteed to work no matter how much staking points there are or how mangled it is. When you have completed this task the sludge tube has to be removed which is very awkward if you do not have the correct tools. If you do not remove the sludge tube you will have to soak it in paraffin and blow all orifices out with high pressure air, this will have to be done several times and then you will end with an acceptable clean usable item but it will not be perfectly clean. Another little bugbear is installing the gearbox internals. Do exactly what the manual say’s and you will not have any troubles even though it looks awkward.
Timing marks on the cam shaft drive gear can be confusing, some gears have three keyways cut into them, do exactly the you manual says for the model and do not get confused by the pictures in the manual as it will no doubt cover several models.
After a rebore the crankshaft assembly should ideally be rebalanced. The cranks when manufactured where never accurately balanced on your first engine strip down even if everything is perfect. It’s worth getting the job done. If you do it, it will make all the diference on the engines life. When restoring a Triumph engine I always try to find out how fussy the client is concerning originality. 70 percent do not care if the cross head screws are replaced with stainless steel socket head screws and as many would like to see the engine cases fettled with a little more finess.
As when they where broken out of there sand casting moulds they were roughly hewn with an angle grinder to get the worst flashings of aluminium off.
Another little thing to look at is the cam followers, The exhaust cam follower stems have a little flat ground on them and a little hole drilled into the flat, these are the exhaust followers, the holes face away from themselves.
Bear in mind I have seen exhaust cam followers mixed up with the inlet ones. Over time in using the engine you will see parts getting damaged notably the cam-shaft lobes and stellited follower faces
Overall the Triumph TR6 is a little power house if maintained properly. Just add oil and as usual on all engines, replenish at the correct intervals.
The little bikes are quite easy to restore as there is not an inordinate amount of chroming involved, most of the paint work is black including the wheel rims and spokes.
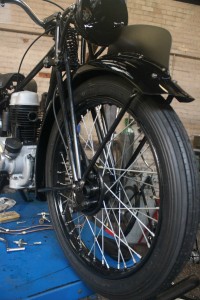
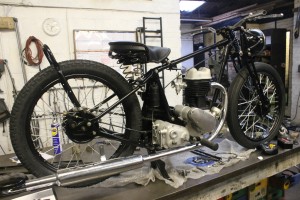
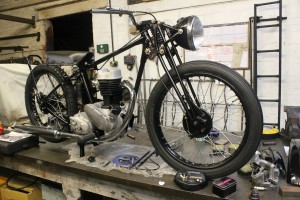
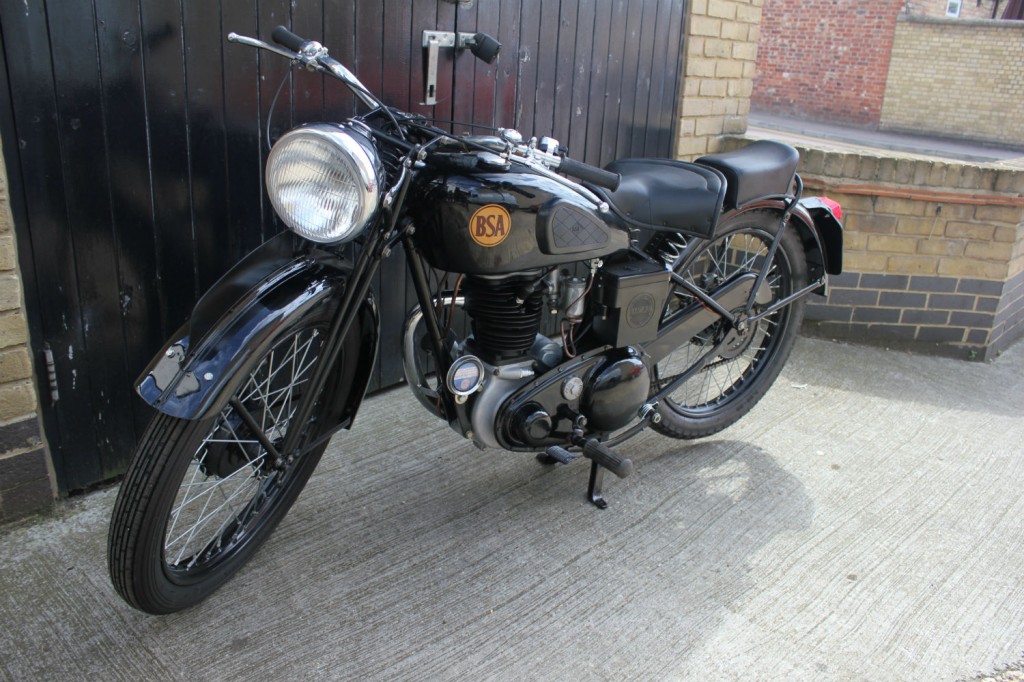
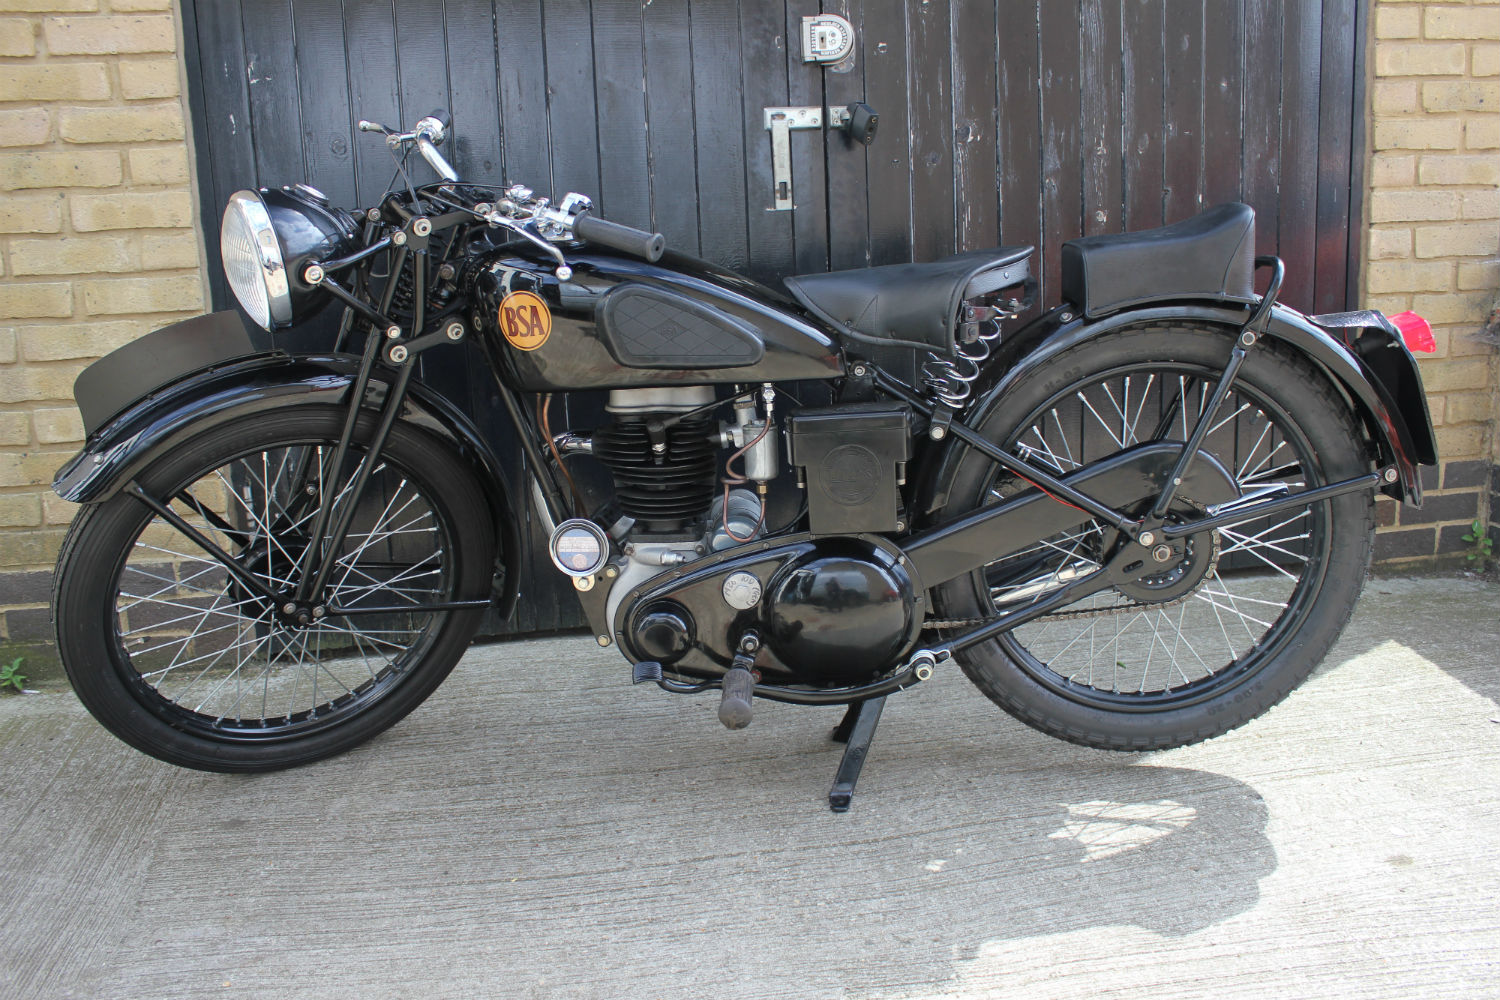
The BSA C11 of 1939 vintage is not a very common beast and some spares are hard to come by, like the slightly upswept exhaust pipe, headlight brackets, toolbox, hand bars, seat fittings, Cush drive and clutch parts. Girder fork parts can be awkward to find as well. As the customer wasn’t too critical about originality, several aftermarket parts were procured by the customers from suppliers purporting that the parts covered the year of 1939.
the engine and gearbox was a piece of piss to restore as they are so mechanically simple and loads of internal parts are interchangeable with so many BSA models of that year and even 20 years later.
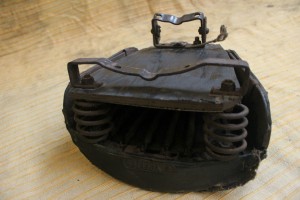
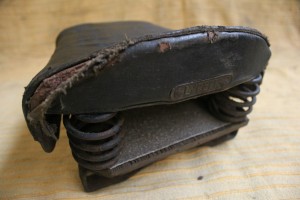
The first bugbear was the sprung rider’s seat, I told the customer that he needed to replace the seat cover, and he said the aftermarket cover and the aftermarket spring seat frame were not much more then buying the cover itself to cover the original frame.
After receiving the new part it was found that there were no seat pivot brackets and nothing to fit the seat springs to the seat frame and the main frame. 4 ½ hours later we had it fitted this equates to f140 + VAT for the night mare .I think it would have been prudent to have taken my advice to get a new seat cover.
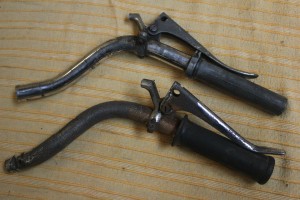
The original handlebars where manufactured in a totally unorthodox manner. The top yoke had no caps to hold the bars on, the yoke had a hole drilled in both ends necessitating two halves, IE: one has to cut the handlebars in half and cut ends into there respective holes. An area of the cut bars had to be scalloped to clear the pinch bolts, “what a crap idea”.
The clutch corks were impossible to source, I used to buy them by the hundreds in the early 1980s, “not now”. I have the press tools for cutting corks. As we used to manufacture them for Hamrax motors, an old batch was trimmed to fit the C11 clutch plates. The head light brackets from aftermarket suppliers were miles out of tolerance so I sent them back and made some new ones from round tube pressed flat and drilled on each end.
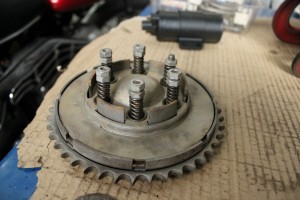
During three house moves the C11 had been dismantled in an attempt to restore her, vital parts that would be costly to replicate were lost this includes the clutch centre and some Cush drive parts. A new clutch centre was supplied by the owner and it was found that the tapered centre was different. The clutch centre was common to several models of BSA of the same year. If you stray from the same year of manufacture you may find that things have been modified or changed throughout the different models. The clutch centre was common to the C10, M20, M21 and the B29 of 1939. The Cush drive parts were all common to the models mentioned above as well as the BSA C12.
When ordering parts make sure that the model is tied up with the year of manufacture. Russel motors would be a good place to start as they have a parts list on there website that employs all the original part numbers.
The back of the primary chain case can suffer from chain wear if chain adjustment and inspection is neglected, the back of this one has been severely worn through by the rear chain. Primary chain cases of this era of BSA C11 is made of pressed steel and are sealed by the outer cover of pressed steel.
The cork gasket that is sandwiched in between the cases should be the correct thickness and quality. Cork gasket material is available from StotfoldEngineering Company. The owner of the BSA C11 bought some footrest rubbers these did not fit as they were of modern BSA style with a square hole moulded into the centre. The footrest bars were of round section so I had to modify the rubbers by drilling with a round hole.
The combined petrol/oil tank with two filler caps is disastrously rotten and is going to be difficult to mend to give long service within the budget price. These tanks are unavailable even in India.
When pricing a restoration job one would expect a tank to be so rotten and difficult to restore to give a long service life. This is really the rotten tooth of the restoration.
The mud guards were really bad with many holes drilled in them, the front guard had broken in half and it needed brazing together. As can be seen in the picture all the holes were brazed. I prefer brazing to steel gas welding due to the lack of distortion. Brass has a lower melting point then steel so the surrounding metal needs less heat to create a bond, less heat, less distortion. Also brass does not rust. the number plate that slots into the front guard was supplied by the owner.
It was purchased from an aftermarket suppler and there was no way it was going to fit so I made a new one as you can see from the picture.
Good heat resistant engine paints are getting difficult to source as some have stopped being produced due to regulations on there chemical make up and possible health hazards. For the home based motorcycle restorers, the preferred method of applying paint is by spray in the form of rattle can. Very good heat resistant paint used to be available in tins for brush coating. The market appears to have dried up for these.
What the engine restorer is looking for in a paint is primarily heat resistance and secondly, resistance to petrochemical attack. In my opinion one should look at it the other way around. I think the thing that looks bad on an engine is not the baking of paint into engine and barrel castings, but the tainting of its finish by chemical reactions from petrol, hot oil, brake fluid or even general handling of the finished product.
Most paint contain some household acrylic based ozone friendly spray paints bare up to considerable heat and reheating but are not tolerant to a good petrol soaking when cold or even a splatter of WD40. I have tested Plasticote acrylic paint in an oven on regular gas mark 9 for 4 hours and have not seen any burning or ash, but the finished product was poorly resistant to petrol and chipping. I have read on many forums concerning heat resistant or heatproof paints. Almost all paints, automotive, are tolerant to excesses of heat unless you paint your exhaust pipes in enamel paint or Dulux brilliant white. A heat proof painted or sprayed finish can be attained by any heat proof paint in Halfords or any other motor factors suppliers. However many of these are very liable to be attacked by petrochemical contact. Sadly, through reading in a few forums that Tecote was the equivalent replacement for PJ1 I purchased 10 cans of the stuff and proceeded in using it on a customers Honda crankcases and barrels. As opposed to PJ1, I found the intensity of blackness to be poor, it was moor or less, when dry to be a very deep roasted coffee brown, its petrol and WD40 resistance when baked into the casting was very poor and it stained easily when it come into contact with the aforesaid mentioned. The staining was in the form of a circular ring in the paint, is petrol was dripped onto its surface. The was due to the petrol drip weakening and dissolving the surface directly and immediately on contact, the resultant effect was dissolved soft paint being forced away from the point of impact and creating a ring stain. Hammerite Stone Chip, even though not advertised as heat resistant showed the same characteristics. Some paint such as Simoniz silver were affected in a different manner, on petrol contact they would partially soften but not stain. If the Simoniz silver surface was left to dry it would revert back to its natural characteristics when the engine is run and the paint is reheated.
If we were to spray a barrel with Hammerite satin as many forums condone as a good engine paint substitute for PJ1. We would find it tolerant to WD40 petrol, but it would soften when initially heated and would not be resistant to petrochemical attacks until it cooled down. On reheat it would fair better but would still be partially harder that the previous heating. Hammerite satin seems to get tougher and more resistant as it goes through many heat transitions. I thought I would give a brush on black paint a look in. on testing it, I found its intensity in blackness very poor compared to, lets say Tecote witch I considered “F” for fair. Its resistance to petrochemical attack “F” to “P” poor. I would use this paint for 2 stroke exhaust systems where beauty is of not so much value as no brough superior barrels or Vincent crankcases.
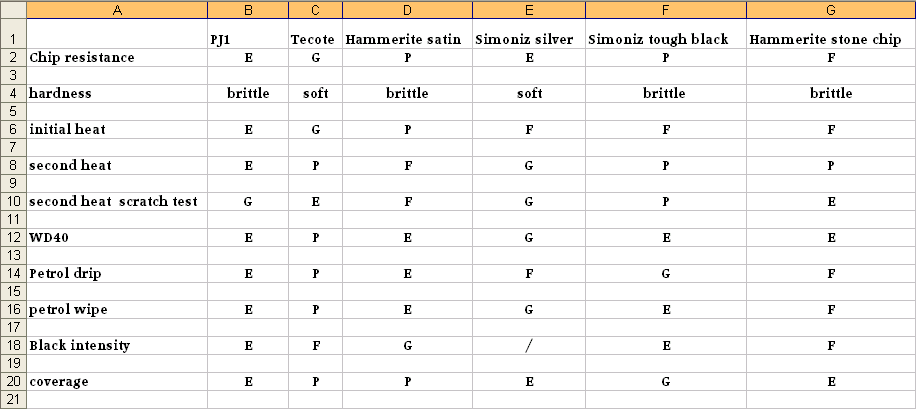
I am now going to set out a graph of what I have discovered, the graph consists of some paints that I have seen mentioned in many forum websites on the web. The paint that I have chosen to feature in the tests are in no chronological order or order of superiority they are randomly picked from the most mentioned paints in forums. The tests were rigorously carried out, employing a polished plate of aluminium, 1.5mm thick. There were no primers used to key the paint to the polished base metal, so all paint finishes had exactly the same treatment. After a month of curing on it’s base metal. Paints will show an appreciable percentage value in adherence to the base material if it has been aqua or shot blasted but its basic characteristics against other out performing paints will not change. All paint’s went through 2 hours of initial heat on gas regulo 9 and second heat of 2 hours of the aforesaid heat.
The chip resistance test was carried out using a stylus with a 2mm point that was dropped on by a ½ oz weight at 300mm height. The hardness test was carried out manually with a very sharp stylus held by a mechanism and drawn over the paint samples by hand. The chip resistance and the hardness have close correlations.
The scratch test was carried out exactly as in the hardness test, but this was done after the second heating session. The WD40 test was one small drop of WD40 left for 30 seconds and wiped away with tissue, this was done after second heating. Petrol drip, as above but left to settle and dissipate in its own way. Petrol wipe, one drip of petrol left on painted surface after second heating for 30 seconds and then manually wiped away. Black intensity was visually measured. If 3 good coats of paint are sprayed or brush painted and it is appeasing to the eye and one has a superior product to base the intensity of blackness on. The coverage is based on one cote of paint or spray according to manufacturers recommendations. The best were Pj1 and Hammerite stone chip and this is what I based the order of e”excellent ,g”good”,f”fair”,p”poor”.
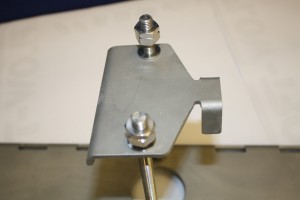
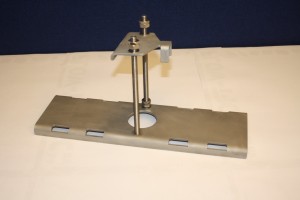
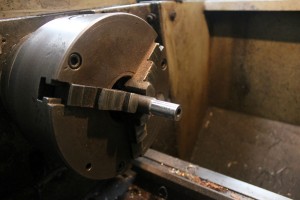
I was asked by a company to produce some parts in a material that I was unaccustomed with, the material was called Ferralium. The part that I had to machine had very high tolerances involved in its production, a very small batch was needed and Stotfold Engineers was singled out to uphold and perform the task. Ferralium was an unusual material in as much as it does not like to be machined lightly (I.E. small cuts). Boron nitride cutters were the order of the day for the cutting tips. Initial roughing cuts were about .050 deep and the finish cuts were .005 deep. There were hols that had to be drilled to take a thread with zero truncation. The Ferralium drilled remarkably well as the low speed high feed rate was maintained with a high speed drill bit. Tapping threads in this material was another matter as normal high speed taps no matter how good they will not tap Ferralium. Special Titanium taps were procured to complete the finished article.
As you can see in the picture there is an Ferralium mounting plate that had a bend in it. When bending Ferralium, larger that normal bending radii have to be employed as the material will crack.
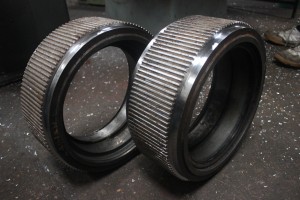
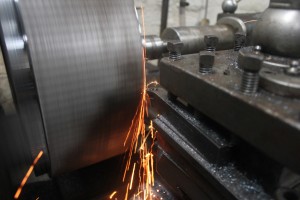
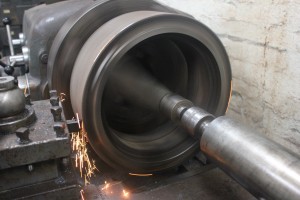
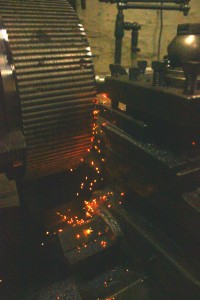
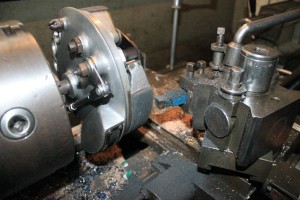
In the following pictures it shows a roller being machined on one of our heavy duty lathes it is used for forming wood pellets, there are a series of three rolers that work in combination together to form the pellets. The rollers are made from a bearing material at a hardness of 62 rockwell, this needed to be machined using Boron Nitride cutting tips “one of the hardest man made materials”. After lots of many small cuts we were able to complete the job. as can be seen in the final picture.
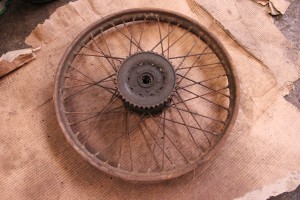
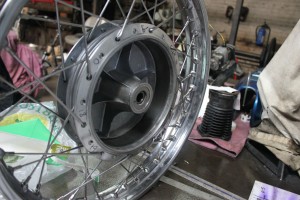
Wheel building is an art if it is done properly. Many wheel come into our work shop from all over the UK for rebuilding and refurbishing. For example a pair of wheels were bought to us that not only needed respoking but needed new rims as they must have sat out in the rain for years as some of the spokes were dangerously loose with the nipples still attached to them. A look at the hub showed a couple of hair line cracks near the spoke holes. After taking the break plate off it was noticed that the wafer thin brake lining had become detached due to the brass rivets decaying and the drum desperately needed reskimming.
This was a complete wheel restoration. The customer was happy to purchase the rims and the spokes from one of the big suppliers as long as I wrote down all the dimensions and rim type that was required. Having gleaned all the information, I passed it onto him. I asked why he came to me for his wheel building. He said I was recommended by someone in his motorcycle club because I could do a set of wheels in a couple of days if required. This was not strictly true. If someone sends me the spokes and the rims to build there wheels I can do them for the next day. This is approximately 5 to 7 weeks faster then Hagons and Central Wheels. While I was waiting for the rims, spokes and nipples to be posted to me I got on with the task of refurbishing the hub. The first thing to do is to blast all of the paint and rust remnants off, so as to give a good clean bare metal finish.
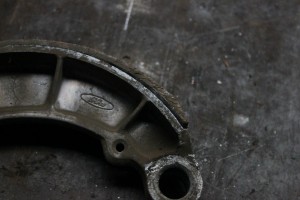
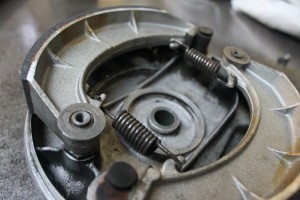
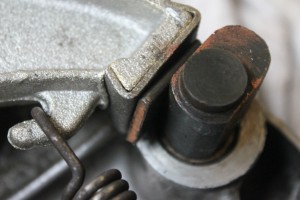
The hub was then sprayed to give its original black colour. New bearings had to be fitted and a set of felt seals and dust covers were made in our work shop as well as a new wheel spindle. This had to be done to both front and back wheel. The small cracks in the rear cast iron hub around the spoke holes were cast iron welded prior to painting. The break plate was aqua blasted and new bronze bushes were pressed in and then finished reamed to size for the brake shoe actuator. The break shoes where of pressed steel and then aqua blasted and the ends of the shoe that the brake actuator bares on were built up with weld and remachined to spec.
The pads where ancient asbestos ones, there’s a lot of replacement ones out there that are made of modern materials. We stock all break lining materials for all models and eras. Some people like to see riveted brake linings as per the original ones that were fitted. Most relining companies although very thin on the ground now like to resin bond the lining on, skipping out the riveting process.
We will do whatever the customer wants. By the time we had finished all the refurbishment which came to 9 ½ hours we waited for the rim’s etc to arrive. 4 days later they were delivered, within 3 hours I was able to phone the customer up and tell the customer that they were ready to be picked up.
The final part of the wheel building process was to set the complete wheel up on the big lathe so we could machine the brake drum to just clean up.
The break plate with shoes and linings fitted were set up in the lathe on a dummy spindle and the linings were machined in the lathe to the exact bore dimensions of the hub. “Hey presto” all done.
Honda CX 500
This is a typical enquiry that we receive on a regular basis. I feel it important to air this on our blog as it shows good reciprocation of information between us and the customer (Simon). Simon initially gave me a breakdown of all the problems suggested by another mechanic such as a knackered crank. 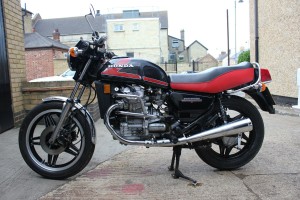
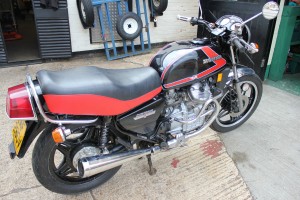
My reply was given on the 14/7/13.
“You can bet your bottom dollar that the crank will need a regrind if the rods have gone and this will need undersize big end shells, small ends and pistons rarely give problems but rings and barrel can get worn out. This is all fixable.
The cost of a strip down would be about £250.00,
A crank grind, at about £80.00,
Undersize shells are about £40.00 but I have had some on eBay for a fiver total,
A barrel rebore and hone is £60.00,
A set of rings can be had at about £20.00,
To put back together would be in the realms of £520.00.
In the past 20 years I have built 7 of these engines as my record shows and one of them replicated the noise that you mention if was found that the main shaft bearing was knackered and this was the only thing that needed renewing. Total £970.00 if all is bad. I don’t know of any engine restorers in your area that could give you sound advice or an estimate on cost, you will find we are the only company in the UK that has the experience in engine restoration and rebuilding that would even hesitate to give guideline cost. Good luck in your quest
P.S. If the guy cant give you a guesstimate cost he does not know his engines.
Kind regards terry”
John replied on the 15/7/13.
“Many thanks for the response and you’ve convinced me that the old CX motor just needs the right amount of care and attention to bring it back to life. I think you’ve gathered that I’m not looking for a full clean up and restoration, because I want the enjoyment of dong that my self, but I do need the internals bringing back to life. I’m not convinced it’s as bad as the main dealer suggested; he listened to the engine run for about two seconds and then declared it knackered. He was trying to convince to buy a bike of him I think.
So now you have got me committed to breathing new life into the CX how do you feel about tackling the project? I’ve not come across anyone any one who gives me the same level of confidence that the bike is in good hands. I will aim to try and get a local transport company to deliver it to your work shop. I will do everything I can to help you source parts David Silver is a very good person for this http://www.davidsilverspaires.co.uk. I will also promise not to hassle you for a quick turnaround and I guarantee I’ll pay you promptly.
The 970.00 is defiantly at the top end of my budget but I am hoping that the problems are not as bad as I have been lead to believe and lady wife’s bathroom refurb will have to be chopped away a little but if you’re up for the challenge we can set the wheels in motion.
Let me know what you think.”
I said 16/7/13
“Bring the bike down when it best suits you. Phone us on 01767318509.”
John said 17/7/13
“Terry I have a bike transporter booked, just need to be sure you are available to take delivery. Is a weekend better for you or Saturday Afternoon?
Also I have a PDF of a CX service manual developed by Honda for US mechanics, wouldn’t say it’s perfect but it might be useful for you, I can send via web file transfer (26meg file) if you want to have a look. Just let me know and I’ll send.
Can we also come to some agreement about payment? The first step is to diagnose the problem and then you’ll need cash to source and buy parts and I don’t want you out of pocket so maybe some sort of upfront payment to get things moving is the fairest method. Let me know how you want to structure this? I am flexible”
I replied 17/7/13
“£500.00 up front payment would be handy.”
The Honda CX 500 was delivered on 2/8/13 with a letter
“A bit of background info that might help you with the CX 500.
I picked the bike up 6 weeks ago and rode it from Nottingham. It was running rough. There was a hole in the exhaust header pipe that I initially thought might be the source of the noise. I’ve replaced the head pipes but the noise is clearly the motor.
Previous owner told me the tank had rust in it and he’d cleaned it out with acid and put a filter in the fuel line. Also he’s taken the carbs off and done a bit of cleaning up. I don’t think he has reset them properly though.
First thing I notices was fuel dripping out of the pipe below the main stand when I stopped. Suspect that there is a float sticking.
When I got it home I changed the oil and put a new filter cover seal and filter cover bolt o ring in. the filter has only done about 15 miles so you could probably reuse this item if you want to.
I also adjusted the cam chain and tappets and notice the left hand exhaust tappets. Setting the correct gap hasn’t improved the sound of the engine thought. Cam chain adjustment hasn’t helped either.
There also a secondary intermittent noise that sounds like it’s coming from the radiator fan at around 30 MPH, which is attached to the crankshaft. This may be a symptom of a crank problem guesswork on my part though – could just be a damaged or badly fitted fan or radiator part.
Handlebar kill switch is very loose and has been an issue when trying to start the bike; I intend to replace this soon.
You have the only ignition key as I don’t have a spare yet.
If you want me to chase parts for you I am more then happy to, just let me know.
Good luck with the motor
Regards john”
I reported my findings 2/8/13
“Received your bike and attacked it with gusto. Firstly I drained the oil and flushed out the engine I then removed barrels and I was able to inspect the crank play on the main bearings I found less than .001″ play. I checked the cam shaft using a stethoscope and found it to be in excellent condition with no appreciable wear. Cam followers again in very fine condition. The pushrods and there ends were as new as if they had been changed recently. Piston rings show no wear and the end gaps are well within tolerance. Conrods and there big end bearings showed .001″ wear. The barrel bores still have signs of honing. The tops of the pistons show that it has run a little on the rich side over some time which is certainly not a bad thing. The piston on the left hand side had marks on the top from the exhaust valves hitting on it. I checked the exhaust valve guides and found them in very good condition but the valves were not seating properly so I re-cut and ground the seats in and checked that the valve stems for straightness. All was OK on the right hand cylinder. I thought It prudent to check the clutch for wear and found that the four spring pressure bolts were well under there torque settings. The clutch plates were in fair condition so we cleaned them in the aqua blaster. The header pipes that you fitted still had the old copper seals in place. You naughty boy you forgot to take the old ones out before fitting the new ones this allows blowby throughout the exhaust system. The balance pipe had three holes in it so we have covered this with a stainless steel plate, they usually rust to pieces but yours isn’t bad. We removed the carbs as this is a bastard of a job even with soft rubbers and found that one of the float needles was not seating so we replaced both needles with modern ethanol resistant Viton ones. We also found a seal and thrust washer missing on an air mixture screw. And the cabs were not in balance. The fan problem was found to be a distorted fan housing that we have put right. I have also sorted out the ignition kill switch; it will give you no problems. There is too much to write at this time in the morning and I must go home now and have a shower. Your bike will be test ridden on Monday morning and will be ready to pick up on Tuesday morning. Cheers terry”
A reply come back from john 3/8/13
“Wow, fast work Terry. The new header pipe seals I have didn't fit the collector box so I was hoping to get away with it.
Is the cam chain OK?”
“I'll contact the courier and see when he can collect.
John”
Another little line to john 4/8/13
“Worked till 12 midday and started the old girl. She sounds absolutely perfect with a slight whine from the hypoid gear that
drives the shaft to the back wheel which is totally normal. She should give you loads of miles of service. It appears that
 you have got a goodun that has been cared for in the past. Cheers terry. Balance due on collection is £230.00. P.S I won’t
lose your key.”
John sounds pleased 4/8/13
“Perfect, thanks Terry. I'll get a cheque in the post ASAP and get her picked up as soon as I'm back. Very much
appreciated.
John”
Another CX 500 saved with many miles of riding and enjoyment to come.

14th august 2014
She’s still running well Terry. Fitted a few new parts recently, collector box, shocks, coils, fly screen, rear brake drums, bits and bobs. She’s happy at 70 mph all day on the motorway. Not bad for a 35 yr old eh.
Thanks again.
JS “CX 500 owner”
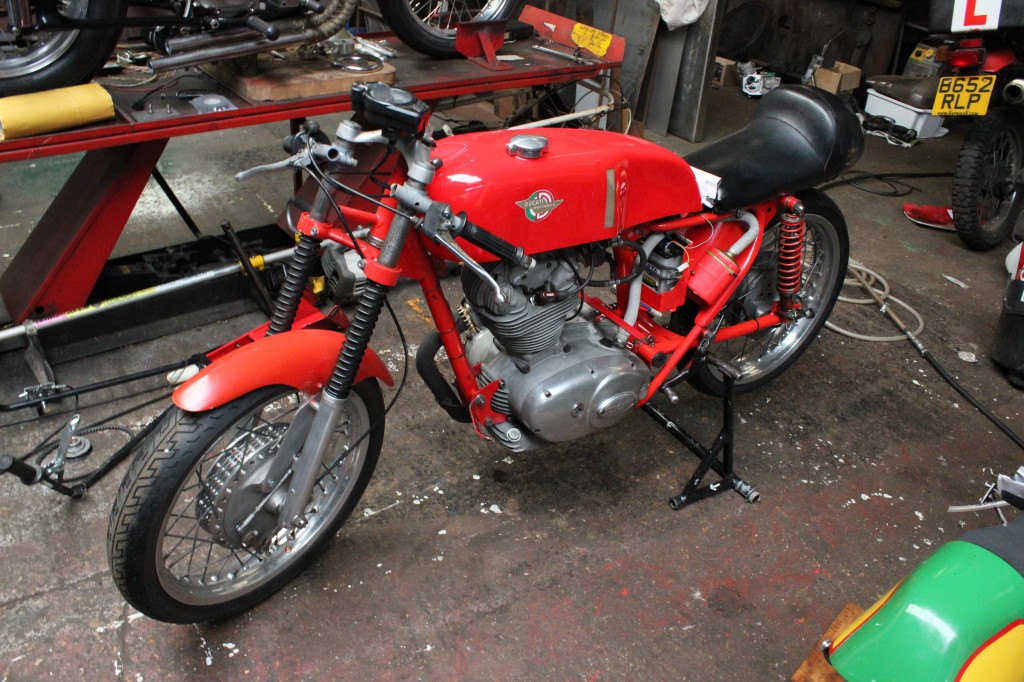
A customer took possession of A Ducati 250 mach 1 and bought it as a runner. After several attempts at starting it by bump starting and roller starting it would not start so he was asked to give Stotfold engineering a look at it.
the engine looked as though it had been shot blasted but it had lost its fresh look and had given way to an unkempt, laid up look. It looked as though the engine had languished on or under a work bench and had just been put in its frame.
As I have said in past blogs a lot can be learned from the visual inspection of such things as gasket edges. edges of casings and screw heads. This duke appeared to have had care in it’s past life. 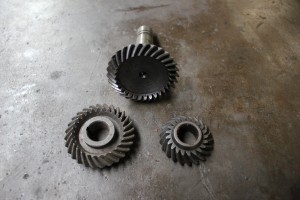
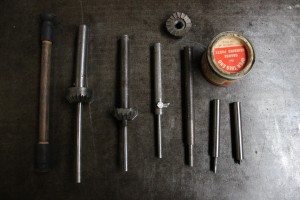
I thought the best part to inspect first was how well the top bevels were set and meshed. The bevels top and bottom are a critical point as if they are meshed incorrectly they can be quite noisy .Bevel drive gears can create a whining sound this is due to tightly meshed gears, i.e. not enough running clearance. Rattling sounds are condusive of to much clearance. When we set correct running clearances on bevels we have to use small circular shims on the gear shaft behind the bevels.
The bevel looked good and appeared to have been set correctly. The bevel cover had no gasket or cement so a new gasket was fitted. Next was to have a look at the cam and followers.The exhaust rocker cover was removed and a torch pointed through the darkness onto the camshaft lobes showed minimal wear. The cam followers or rockers were the adjustable type as is typical with British iron. I personally don’t like using these for racing as I have known the adjusters to come loose. The one piece rockers are better in as much they can be lightened easily and they absorb less energy, but it didn’t matter on this bike as it was not going to be caned on the race circuits. I checked the exhaust tappet clearance and found it to have .021 “clearance”, way to much! These should be .008. With this sort of clearance a lot of clatter will be audible. Also valve opening times will be delayed and closing times will ensue to early.
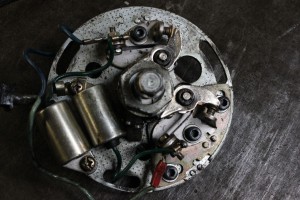
Inlet clearance wasn’t much much better, reading .019″ as opposed to the correct .005″. The rocker boxes were cleaned of there old gaskets and new ones fitted. The gaskets had been fitted initially with blue Hylomar, there is no need for this as original cover gaskets are thick and pack down well as long as the screw threads are ok and not stripped. A look at the ignition system under the inspection cover on the timing chest revealed points ignition. I don’t mind them but they do require regular checking and they are fiddly things of the past and the condenser was knackered on this duke.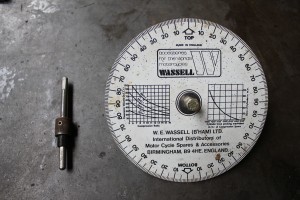 Timing disc, top dead centre probe, and electronic beeper sorted the ignition timing out. Regarding the electrics, the plug was an N.G.K. 6 which will give good starting properties but I think a little soft and hot, a 7 or 8 might be better but may need preheating for easy starting. The plug electrode was also touching the piston crown and partially closing the gap. A copper spacer was made to bring the end of the thread near the electrode flush with the inside of the cylinder head.
a plug with a flush electrode could be used.
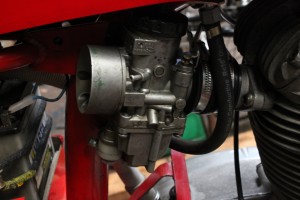 The carburettor was a mark 2 amal concentric that showed flooding problems so it was dismantled and inspected. the float needle valve rubber tip had gone hard so this was replaced. The needle had a piece of copper wire wound around one of the grooves and soldered into place, a bit odd.
I replaced the needle and fitted the correct clip. All jets and orifices were inspected and cleaned out with high pressure air.
The fuel taps were cheap’os and leaked as did the hoses that had crimped clips, don’t use them, use good quality jubilee type clips.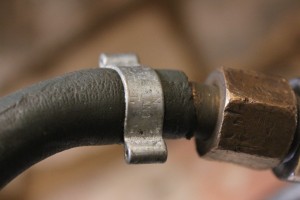
The rear underside of the petrol tank had a split in it and was weeping fuel, this is really not good as the rear of these tanks are sometimes supported by sponge or some type of high density foam. the sponge or foam will soak up petrol and a little blow back in the carb due to cam overlap can catch it alight. Fix leaking tanks and don’t use foams. Use rubber sheet or rubber tube to mount tanks as they won’t absorb fuel. Check carb settings, battery voltage, choke on, fuel on, and pull back on compression stroke and push, “bang” she fires into life.
The Honda XL 125 has a good pedigree and reputation also there is many variants of these machines, the Americans love them for off roading as suggested on many U.S.A. forums. A favourite enhancement to the XL,s is to fit a molossi big bore barrel kit, The advantage in doing this mod is twofold, if you like performance you will get some! If you like buying big end bearings you will have to get some.
The big bore kit that brings the 220cc needs extra breathing through bigger valves but riders usually leave the head alone. The outcome of the big bore enhancement is more unreliability and the guilt of riding a bike illegally over the capacity limit. The Honda XL 125 came to me with all the problems that could be expected so I stripped it down and took off the big bore Malossi barrel and replaced it with a standard barrel. Renewed the bent valves and guides that had rattled about in the head. The out come was a reliable standard engine, Not so , as when I was getting oil from the other workshop to put in the engine that had been fitted with new piston and barrel, guides, and valves. I could hear the engine having its nuts revved off. “AAGH”! I cried, what are you doing? , just needed to hear the beat of the engine, it sounds great;”it won’t harm it just doing a few revs”. I put oil in it through the dipstick hole as I watched smoke coming from the hole as oil displaced it. The engine wasn’t restarted as he was eager to get it back home and get back to work.
A couple of weeks later I got a phone call saying “the engine doesn’t work and I spent £70 on getting it compression tested and I am not happy with your work. I replied, “I will pick it up and have a look at it”. On inspection I found the inlet valve was bent but only just enough to not cause a good gas seal. All was fixed free of charge. The bike was delivered back to his home. Several months passed and I received another call from a very disgruntled Honda Xl 125 rider threatening me with court and trading standards part 2 bollocks and so forth. He said I am bringing it over and leaving it to you to fix I said ill have a look.
On dismantling the engine and seeing the piston and barrel scored beyond redemption I thought I am dealing with someone who shouldn’t own or ride a bike as it had definitely not been run in correctly. Phoning him back I said it had seized due to not being run in, he replied “I never went over 40mph” I thought in what gear were you in, first at 16,000,000 revs. The threats came thick and fast, I am going to have you hung, drawn and quartered and I am going to dance on your grave and then get trading standards on to you. At the end of the day he hadn’t adhered to the running in procedures and hadn’t even checked his oil of which the engine was devoid on final strip down.
My summing up is that the engine had been satisfactorily built to the correct specifications but the running in procedure had not been adhered to. Initially the engine had been revved with no oil in it causing damage to the rings, i.e. nipping up in there ring grooves. This was the major part of a loss of compression not the inlet valve. After I had fixed the bent valve I didn’t think to inspect the piston and barrel as they had only 200 miles under there belts. Inspection of spark plug showed a mixture on slightly the rich side and the tail pipe showed a little black dry residue. This showed the bike had been run prior to bending the inlet valves. Oil level and colour checked out ok. On it’s final strip down the plug showed white, barrel and piston as mentioned before was fixed and the tail pipe was 3mm thick of fluffy black soot. This beasty had burnt a whole sump of oil leaving it dry. As one of the top manual toolmakers and mechanical engineers in the UK and a doctorate in mechanical engineering also with 34 years of experience to boot. Don’t try to pull the wool over my eye’s I will see through your untruths. If perfection cannot be attained we will not take on the task.
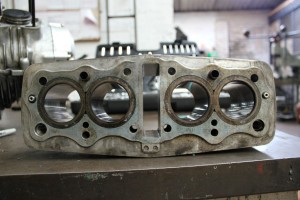
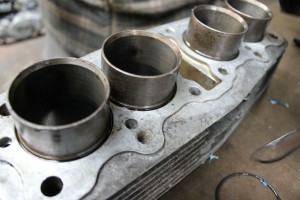
There comes a time in an engines life when it will require reboring or relining. This operation is called for when the engine has lost power due to the piston ring to cylinder clearance exceeding there maximum operating limits. The first port of call in accessing worn cylinder or barrels is to look at the area of the top of the barrel. You will see a dark annular area with carbon deposits. Just below this area a clean shiny section will appear, this will signify the uppermost part of the barrel that the top piston ring reaches.
When the ring on the piston reaches its penultimate height it has to take the force of an explosion caused by the spark plug creating a spark that will react on the fuel air mixture that has been created by the carburettor and then passed through a valve into cylinder head.
The explosion of fuel be it ethanol or methanol will cause the piston ring to take a proportion of the explosive force. The piston crown or top of the piston will take a lot of the heat and force produced during combustion. During the short burning process of fuel, about 45 percent of the explosion force in an ordinary combustion engine is transferred to the top ring. The action of the explosive force on the ring is generally on the part of the ring that protrudes from the outer periphery of the piston. Pistons are always smaller then the barrel or cylinder that they run up and down in, it’s the rings that do most of the work. The top ring only takes as previously mentioned 45 percent of the explosive force work, but due to its small section in comparison to the piston mass, this is a lot of work. Not only does the top ring have to take down forces due to volatile mixtures exploding above it but it also has to take forces produced within its inside diameter that push the ring outwards on to the bore of the cylinder
This outwards force is at its greatest when the piston is near the top of its stroke. This action can cause a ridge just below the carboned up area at the top of the cylinder. Prolonged running on a cylinder with a ridge will cause the ring to move in and out of its groove in the piston causing wear to the top and bottom of the ring groove this will then cause ring flutter. Ring flutter is an upward and downward movement of the ring in its groove. Signs of ring flutter can sometimes be seen some distance from the top of the cylinder and will look like a series of annular marks. Wear on the outside of the ring will in turn cause the ring gap to open allowing blow by. Blow by will be evident below the top ring as either a light brownish to black colour depending on limits of wear.
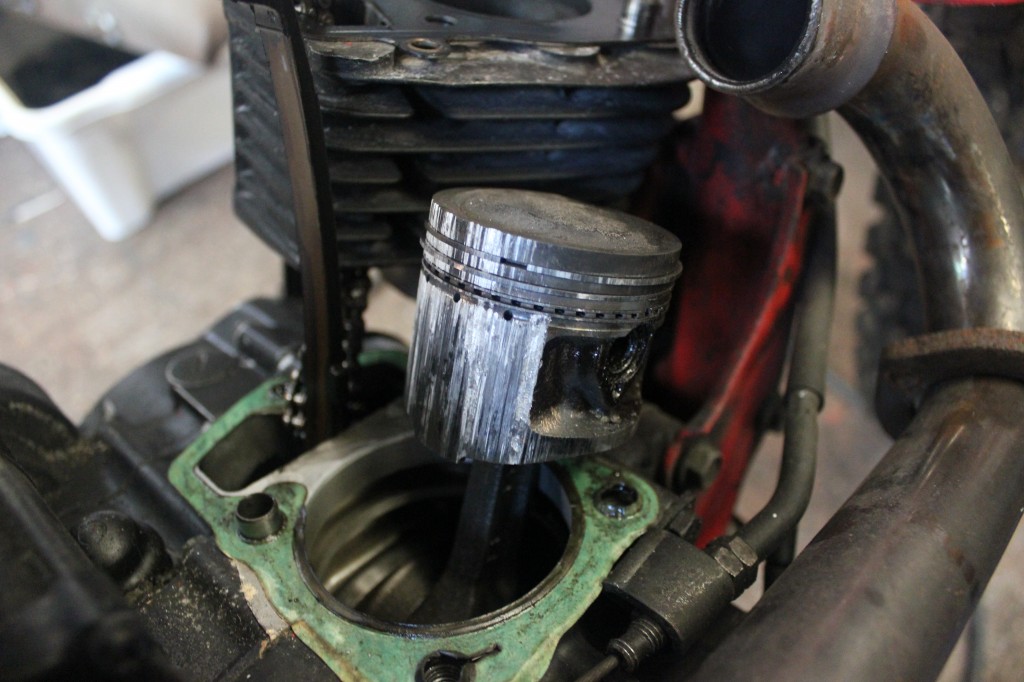
The ring is not the only thing that can cause wear to the cylinder wall surface, pistons can also be the culprit. When we remove a piston from its cylinder we will notice small lines running from the crown (top) of the piston down to its skirt (bottom) even if it’s a relatively new piston. The lines are caused through particles of grit or dust entering the oiling system. These lines are not generally associated to piston wear. Deep lines or scores on the piston can be removed by the use of an oil stone run annually around the piston in the area of the damage. Galling may occur, this is a more serious condition that can be caused by dirt, old oil, lack of oil caused by a faulty or worn oil pump or leaks somewhere on the engine. Galling on pistons usually has an adverse affect on the cylinder wall and piston rings, this calls for a rebore job with an oversize piston and rings.
Piston skirts may distort due to there not being enough running clearance between piston and cylinder. Gudgeon or small end pins may push or wear through the circular clips that keep them located causing irreversible damage to cylinder and piston. Rings may break causing damage to the cylinder. Small end bushes may seize due to incorrect sizing or overheating causing loads of damage. Pistons may seize due to bad running in. At Stotfold engineering we have seen engines with holes burnt through the crowns of pistons due to preignition caused by to lean a carb mixture, I.E. Too much air to petrol mixture. Petrol plays a massive cooling role in the combustion chamber. A liner is employed in engines with aluminium or magnesium barrels, liners can be made from close grain cast iron or steel. Liners are put into barrels that have been heated and the liner cooled, the liner is then slid into the barrel casting and allowed to cool, we have made liners as thin as 2.5mm thick.
There is also the wet liner , this is a liner that has quite a thick section, the cylinder block, usually a car, has water ways in it to aid cooling. The block is machined or bored out breaking into the waterways then the wet liner is let into the block so when fitted, the liner has cooling water around a large area of its body.
There are of course coatings that can deposited on the cylinder bores, usually on 2 stroke engines. The barrel is cast in a foundry and then machined or bored to a given size, the barrels are usually cast in magnesium or aluminium. After the boring process is done the barrel bore is then Nikasil coated employing an electroplating system or it can be sprayed internally with ceramic coating, both processes will need diamond honing tools to finish the bores.
The general rules of reboring cylinders.
A cylinder or barrel is presented to us and we will assess the amount of wear that has taken place, usually this will be the next size up for the new piston, +.010″ for British bikes or .1mm for European or Japanese bikes we will then place the barrel or cylinder block on the boring machine and bore them out using a tungsten carbide cutting tip. To get the best finish we leave about .0005thou smaller than the finished size that we need. The .0005thou is needed for the honing process that will leave a swirl pattern within the cylinder bore. Prior to the 1960’s barrels were not honed as the cylinder boring process would give a perfect enough finish. Almost all Japanese motor manufacturers for instance hone there barrels which gives a nice “run in” finish with nice swirl patterns within the bore.
Other than a full gasket and seal kit and your engine condition is within the limit and conditions conducive of a run in machine, it is always advisable to change the cam timing chain, if this brakes untold damage can occur to the top and bottom end. Valves always need inspection as they can wear a bit thin where they make contact with there respective seats in the head when the valves show wear, leaving a sharp edge on the lip after cleaning they may need refacing and the cast iron seats will need recutting and grinding in using valve grinding paste. The valve stem to guide clearances must not be too loose as they wont seat properly. Valve springs really need replacing as they do not readily lose their strength inhabiting valve return.
When refitting the springs it is important to note that they seat onto shims, the small inner spring and the larger outer one have there own shims .if you neglect the shims the springs cause a lot of chafing because they oscillate they also produce a slight rotational movement witch the shims will take care of.
Valve guides are made of close grained cast iron and are very resilient but they will sometimes need changing. Great care has to be exercised not removing them but refitting new ones as they are very tricky to maintain squareness to there bores and the top faces can be easily bruised if they are beaten into a cold unpreheated head .
Let’s have a look at the bottom end and assess what we can find. Gearboxes on all Honda CBs are well over engineered, heavy gears and large diameter lay shafts, it seems that Honda anticipates misuse, IE missing gears but even under these conditions they are generally unbustable.
Selector forks will put with some wear on there selecting faces. The faces act on a gear by shuttling the gears back and forth and they are very hard, measuring around 58-60c Rockwell hardness, just a little harder than the gears that weigh in at around 56 Rockwell.
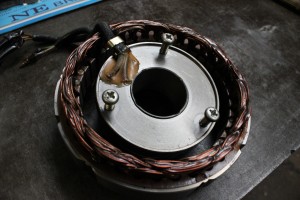
Seals will need changing, not because they may be worn but because if you get an oil leak through leaving them in, they are buggers to get at when the bottom end is closed up. The electrics, IE the generator on the end of the crank and the points on the other end of the crank and not immersed in oil or open to the elements as they are found on a load of British bikes they both have there well sealed inspection covers and very rarely give any trouble although the points will need occasional checking every so often.
All in all these CB 400s, CB 500s and 700 engines are a testament to Japanese engineering and will stand the test of time although restoration can be an expensive procedure, the mane part not being the labor but the replacement of worn parts.
Forgot to mention that if you mix up the crank shaft white metal shells or big end shells and have not put them back exactly where they came from. The engine will rotate and run for a short while until the whole engine starts to get roasting hot and comes to a stand still. mark them as you remove them from there semi circular housing, we have had several different makes of engine that have suffered this problem and it more or less doubling the cost of the restoration.
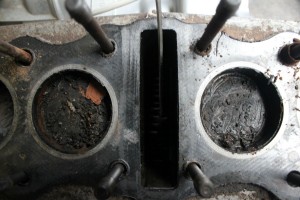
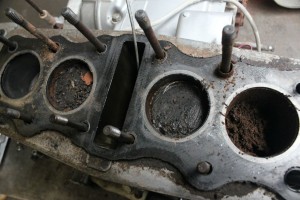
With the head and barrels off and a look down the bores and “Olay”, l could see the faint swirl marks left through the honing stage in finishing barrels.
Those swirl marks show that all is well between pistons and barrels, this engine had been running on the rich side there was lovely soft carbon on the top of the piston. Soft carbon can be differentiated for hard carbon which has an ashen gray appearance by its pitch blackness. The ashen grey carbon spells trouble with rings, piston skirts and barrels. When we burn petrol it has to be mixed with air, the carbon does this bit as long as it is set up correctly to give the right air to petrol mix through its many orifices and jets. When setting Carburettors up, particular for the small Honda CBs, it is best to run a little rich, IE more petrol to air, but not in the detriment to clean running and combustion. If we were to race a CB400 Honda we would set the carburettors up to run slightly off the rich side, this would give us a little more performance as all the fuel that entered the combustion chamber would be burnt up giving full burning performance, on road vehicles of the historic variety we wish to keep going for as long as possible, the best set up is not to attain a full fuel burn for performance but to set up the carb on the slightly rich side, this will save your engine for the next generation so they can clean the tops of the pistons, wire brushing soft black protective carbon from there crowns.
Have you ever thought how great K and N or any aftermarket filters would liberate the engine from its air box, forget it, don’t do it, it really mucks up carburetion and can send the best mechanic into despair checking plugs, ignition timing, plugs leads and all sorts don’t do it, life’s to short. Keep the air box. The only weak point with the little Honda 4s is the carburettors, if the bike is to be laid up for some time and not used I can guarantee the carbs will suffer. Fuel has changer from good old lead fuel to lead free ethanol based fuel. Unfortunately when this modern fuel sits in 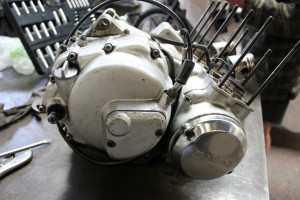 the carb bowls and fuel system it attracts the water because it is hydroscopic. Early carbs have brass floats as well as all the other fittings such as jets which become furred up with copper oxide (green stuff). Rubber seals suffer from water absorption in carbs. Rubber seals have not changed with the evolution of modern ethanol based fuels. And when you buy a new seal kit for your carbs they will be made in the same spec as 30 or 40 years ago.Use you Honda and you will benefit even if you leave it in the garage or drive idling for 15minutes ones a month. It will keep your rubber seals supple and sealing and there will not be any horrible copper oxide.
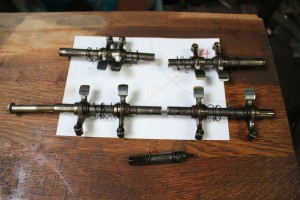
We were offered a 1976 CB400 F, brand new never run for 36 years and the only reason why it would not start were the carbs. Coming back home to the engine inspec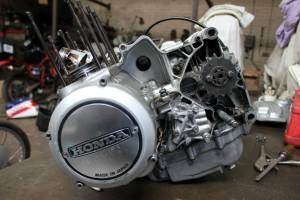 tion, camshaft cylinder bore, piston. The next thing to change regardless of how good they look are the valve seals, visually green rubber with a little double coil spring wrapped around them to hold them onto the top of the valve guides usually on the exhaust side, these are sometimes supplied in a black colour but they do the same job.
This particular Honda 400 is the 1977 F model the mastery with this engine is its simplicity in its layout and construction, horizontally split crankshafts and there usual sandwich of barrels, head and cam cover make it a joy to work on. These engines as with all the CB 4 cylinder models can be taken completely apart with the simplest of tools in about 5 hours. As is typical with all Japanese motorcycles there is the usual array of seals and gaskets to ensure oil tightness and keep out dirt ingress. The multitudes of seals are needed on these Honda engines as they have a very generous amount of circulating oil particularly in the top end.
The 8 valves,4 pistons and as usual the cam shaft that rotates in journals cut into the cylinder head need plenty of clean filtered oil.
Honda CB400s run on rather the hot side because of the compactness and shallow Finning and of Coarse higher than average oscillating speeds of the moving components. Disassembly is of Coarse easier than assembly and great care and diligence has to be maintained during the rebuild as certain rules typical to CB 4s on assembly will apply. This type of engine restoration is not for the faint hearted as all parts have to be kept in order and assessed for wear or damage. When rebuilding CB four cylinder engines the first part of our inspection will be the camshaft as it will be the first mechanism operated part uncovered during our strip down.
a well cared for engine after about 25 thousand miles of running and regular oil changes will show about .005 thou of wear on the cam lobes. 50 thousand miles of normal riding with the usual regular oil change will show .010 thou of wear. For a CB 400 four of 1977 vintage this will equate to 2500miles a year of riding for 20 years as this particular bike had also not run since 1997. Wear on the cam lobes have been noted in our workshops of up to .050 or 1.27mm and have only a small detrimental affect on performance. We have sectioned several old cams in half from CB400s up to CB750s and found that the hardness depth ranges from .035 thou or 0.88mm to .57 thou or 1.4mm. Camshafts are made from a metal that can be made hard through heat or chemical treatment and the usual depth or hardness is about .030 to .040 thou deep and a typical material specification is en 36B. If a camshaft was hardened right the way through it would snap like a carrot in no time at all. So what we are looking for is a tough inner core material strength and a really hard coating of hardness of about .035 thou deep, this will allow a certain amount of flex which is needed for long service life in a camshaft. Camshafts, when you get to know them can tell you a lot about the engine history. This particular CB400 F model told me through its cam lobes what the piston bores would be like, “nearly run in”.
Some picture of a previous CB400
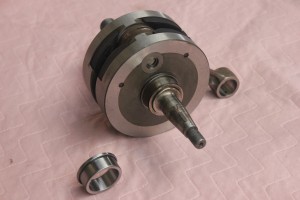
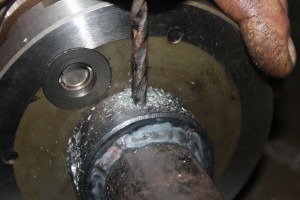
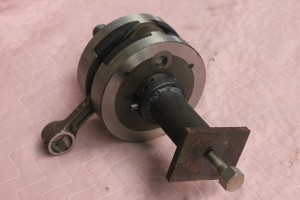
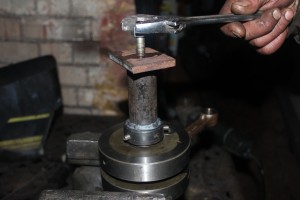
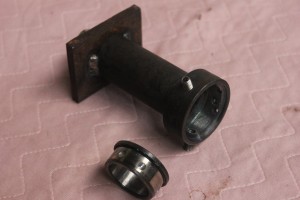
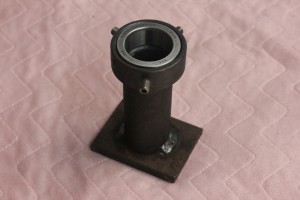
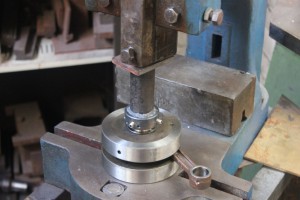
The inner races of roller bearings can be very difficult to remove from there shafts without the correct tooling or extractor.
You can trawl the web and find all manner of ways to remove them. The most common way is to heat the inner race and to try and lever off the inner shell using sharp screwdrivers.
This usually does the job, but without care and much effort this method causes damage to the shaft and the locating shoulder.
Another common method is to grind a section of the race away thus loosening the press fit.
And then applying a spanner to the circumference and then turning the inner race. This method can mess up things if not applied in the correct way.
The reason why these inner races are removed is because the bearing is worn. The outer part of the bearing may be changed to give half the worn out limits, : IE if you have a worn roller bearing the outer shell will be worn and the rollers will be worn and so will the inner races, so by changing the outer race and the rollers you can minimize this wear.
Unbeknown to some you can get oversize bearings which will give you the correct running clearance
but this will not give long service as the surface texture of the inner race, roller and outer race has diminished.

