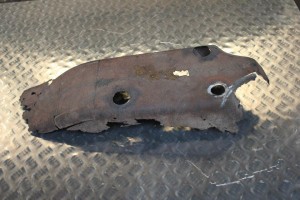
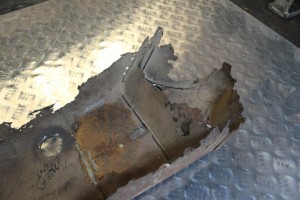
Since we have made so much replica petrol tanks in mild steel sheet, I thought it about time to mention the making of one, and what procedures I employ. Someone lucky was in ownership of a 1912 Ariel motorcycle with a rust eaten tank. The tank bottom had been completely rotted away with its fuel tap and mounting holes but I felt I had enough to work on from the look of the photos he emailed me.
As the owner lived so far away and was not about a lot of the time he was unable to visit our workshop. I asked if he could send me the existing tank and any brass fittings that he had. As he was versed in the reading of a ruler. I asked if he could give me a cardboard cut out of the actual area where the tank nestled in among the top tube of the frame and the tube that the base of the tank was to be mounted to, also required were the measurements of any mounting holes and fuel tap holes. Some days later I received through the post the cardboard cut out and all the other measurements’ written neatly on paper. The hole measurements were taken from the mid line of the length of the tank aperture in the frame.
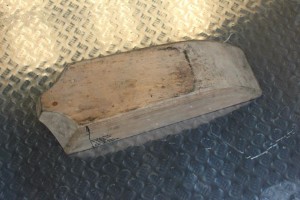
the first step was to take existing dimensions from the tank and marry them up to the cardboard cut out not forgetting clearance for fitting the tank in among the frame tubes. The next step was to make a wooden model or buck of the tank employing all the information gathered. I made the buck from pieces of oak board that I had lying about in the workshop, the pieces were just glued and clamped. Since the tank was basically slab sided with two scollops at the front, machining was fairly easy in one of our milling machines I had to cut the scollops or curves by hand using a template to get them mirror image. It’s a shame that the buck is only used for making a cardboard cutting template to lay over and trace onto a sheet of steel.
The customer was very particular about the tank being made in the manner it would have been made in 1912. the original tank would have been made on a metal pressing machine as the pressing tool would have been used to make tanks for many motorcycles of the period. The tank consisted of a base plate with folded up edges to give a good sealing area for the leaded joints. Two front scollops with folded edges. One top plate which formed most of the top of the tank .Two inserts to be let into two cut outs in the top of the tank where it sloped down towards the seat. One bent and formed part in front of the tank which followed the curves of the scollops. It has to be born in mind that not only was this a petrol tank, it was also oil tank, the front quarter of its length was the oil reservoir that had its oil retrieved employing a best and Lloyd hand pump.
There had to be a barrier plate that segregated the oil from the petrol and one baffle plate with turned up edges to stop the petrol from sloshing around in the petrol tank side. Baffle plates in these veteran tanks were probably used to support the thin shell of the tank, stopping distortion in the soldering process. Originality in constructinng this particular tank had to be adhered to.
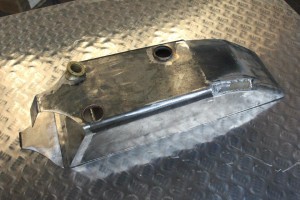
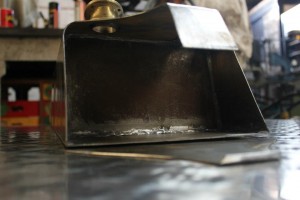
This tank could not be manufactured on a metal press so it had to be produced by hand as a custom build. Tanks in the veteran days were produced from very thin sheet metal as low cost of production was paramount and materials were always used conservatively in industry. My metal thickness choice was 2mm think as opposed to 18 guage, this would give rigidity and long life, considering the ethanol based fuels we use today that are hydroscopic. The cardboard template of the top of the tank was traced around onto the sheet metal with an indelible marker pen and the metal was cut out using a jig saw and corner notching machine. all the other parts were duly cut out using the same method with all there folded edges produced by hand. As I do not have the metal tinning facilities as used in the day of old, everything had to be tinned by hand.
Tinning is a common process used in vehicle radiator manufacture. All the metal sheet would have been cleaned or pickled and then dipped in a lead solution ready to be soldered. The aerial tank parts had to be leaded on all there edges to guarantee a good soldered joint and the flux I like to use is bakers soldering fluid, it is expensive but it does its job very well. Before the tank was soldered I had to tack weld with silver solder all the parts together. When tacking with silver solder you have to have absolutely sure that there is no flux residue left as soft solder will not flow over other fluxes. Everything tacked and it is time to soft solder it all together. I am not going to go into depth in which order the parts are soldered together but there are many pitfalls to overcome if you are not carefull. Some of the brass fittings have to be soldered on before the main body of the tank could be soldered together. Bosses for mounting the tank to the frame and petrol tap bosses had to be silver soldered on to the base of the tank before tank soldering could be comensed.
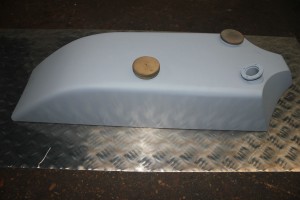
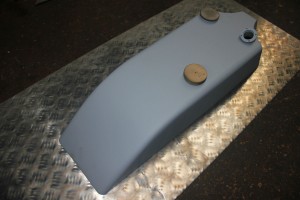
Leak testing was as easy as blocking all the holes or apertures up leaving one small one, ie: petrol tap boss hole, to take an air line with about 10lb (pounds) of pressure through it. All you have to do is go around with a watery mix off fairy liquid and see if any bubbles appear in your welds. success in one hit ,”no leaks”, and no more soldering. No matter how carefull you are with the soldering you will always get a certain amount of distortion in the metal work. Even through the distortion is only slight it has to be got rid of as the paintwork will highlight it, much filler priming and rub down’s with sanding blocks sorts these problems out.

Thanks for this, I am about to do the same on a 1929Dunelt Majestic oil tank. Fingers crossed!
I need a tank like that, do you know of any for sale? or what can make it? regards
We can manufacture one for you, can you contact us on 01767318509 to discuss your requirements.