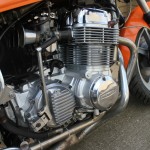
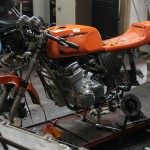
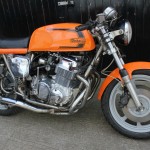
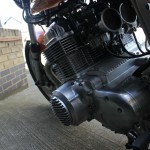
This particular Rickman Honda had been laid up for several years before it was given to us for an engine overhaul. We have rebuilt only a few Rickman Hondas in the past 20 years.
The name Rickman enticed the purchaser to believe the engine had been upgraded in some way to give Rickman performance, not so, as the 750cc Honda power units are bog standard but many riders of these machines therefore gave them more throttle so that Rickman Honda engines after a strip down commonly show stretched and worn chains plus worn chain guides.
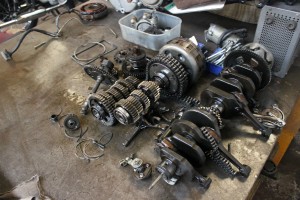
Piston rings sometimes break after fluttering up and down in the grooves. This particular machine did not have a hard life although all of the above problems had occurred accept that all of the top compression rings had broken up but had not worn there ring grooves in the piston. The barrels where in excellent condition with no scoring and only showing .001 thousandths of an inch wear. All that was needed was a light honing. The motor itself was in excellent condition. The gears, selectors and dogs showed literally no wear as they are always bullet proof as gear selection is so positive that few mistakes can be made.
Plenty of revving on these machines does cause some valve seat damage if the top end runs a little lean and hot, this bike showed a little wear on the actual valves themselves but not on the seats. The top of the pistons were black soft carbon but underneath this layer was diamond hard brittle biscuit coloured carbon showing it had run a little bit on the lean side and when the owner said it had started first time after being laid up for 6 years the carbs laid on a soft fluffy but oily layer of black carbon.
On draining the sump of oil it was found to be about 50 percent petrol, good and thin enough to run a two stroke on. Hmmm! Petrol taps leaking or left on during its 6 year retirement. The taps were tested, no leaks. Petrol taps left on! Good job the owner didn’t run it for long, for it was acting as flushing oil, and boy did it do its job on the engine strip down. As all was very clean allowing us to check all working internal parts for wear.
The Rickman frames have a top tube that allows one not to battle or lay the whole bike on its side to put over the engine that lies on its side precariously on the rag covered floor. Although it takes 3 reasonably strong persons to lift the engine into its cradle, it’s not difficult although it looks daunting as these big 750’s do pack some compact weight. Don’t even try to put any 4 cylinder Honda in it’s frame with the bulbous finned oil filter housing protruding from the lower front of the engine, it wont go.
Another bug bear is the closeness of the inlet and return oil feed unions into the bottom right hand side of the engine. Bare this in mind, as if you were to tighten all of the main engine to frame bolts and then plug the oil pipe fitting into there requisite housings amounting to two, you may get some problems. Leave all the bolts loose and then jostle the engine around so as to locate the two big oil pipe unions into there housings. If you follow this order you will save about an hour of hassle in undoing bolts and retightening them. This engine refused defiantly to be removed from her harnessing cradle due to the dreaded long front engine bolt that always seems to bond with the crank case apertures that it passes through, 3 hours of manual drilling with the pistol drill will free it up, but mind how you hold the drill in line with the bolt or you may find your self drifting into the aluminium cases.
Other typical difficulties to remove bolts or studs are found on the header pipes going into the head. Studs with brass nuts would have been a goog idea but Honda stuck with steel studs that had to have there steel rust bonded nuts welded by iron oxide removed. A receipt for a selection of short broken studs. Removing old manifold or header pipe bolts would strip the threads out of the cylinder head. In both cases they would have to be expertly drilled out.
A not so common problem is stripped spark plug threads even though we had to deal with one on this Rickman Honda. When plugs are removed and replaced the packing washer flattens and provokes over tightening. The thread length of Honda 4’s plugs will allow a reasonable good compression seal with very light tightening.
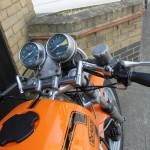
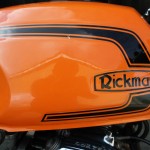
A common dilemma is to cross thread the number 2 and 3 plug holes as the plugs are quite difficult to locate. The petrol tank on this bike when undressed looks rather rustic and 2nd world “warish”. But dressed in its canopy of orange Rickman fibre glass it looks good and balanced with its matching seat. When I initially took on this project the owner gave me a list of what was wanted and I said 2 weeks but on meeting with him, he put some added extras such as brakes needing attention and fork yokes needed changing and modifying and wheels wanted painting silver as well as electrical handlebar switches and such needed changing and modifying.
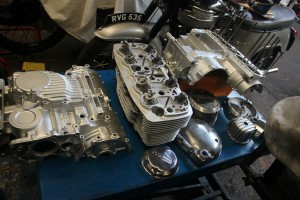
I thought I would use this project to show collaboration between customer, supplier of parts and builder. After stripping the engine and assessing what parts were needed I contacted the customer and told him what parts were required within 24 hours David silver Honda spares delivered on time just after we had vapour blasted the cases, barrels, head and polished the various covers.
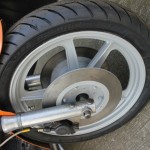
Due to the customers fast contact and placement of order from David silver there was no halt in the engine rebuild. While the engine was being put together the wheels were taken to my brothers to be silver sprayed in 2 pack as I needed them back fast so I could skim the chronically rusted and pitted discs and then after this the front and back brakes A P Lockhead would need bleeding which can be quite awkward to do. The aftermarket handlebar switch gear has wire colours that didn’t match existing colour codes, we will have to buzz these out and figure out where the coloured wires go.
Difficulties can occur when working on a standard wiring loom that has been messed about with, IE cut wires changing colours from say dark green to light green. After inspecting and gentle tugging and picking at terminal connections and component connections the weak spots come to light and can be repaired. This is cost affective as a full rewire and component replacement would be in the order between £700 to £1000 opposed to £200 to £500 for a good reliable fix.
The wheels came back after 3 days the disk now needed to be refaced which I will do on our big lathe, they need to have a minimal amount of metal removed so as not to make then thin. One of the front brakes callipers has had its hydraulic line feed nipple broken in it. Careful and judicious drilling will remove it without disturbing the thread.
Difficulties can occur when working on a standard wiring loom that has been messed about with, IE cut wires changing colour from say dark green to light green. After inspecting and gentle tugging and picking at terminal connections the weak spots come to light and can be repaired. This is cost affective as a full rewire and component replacement as this would be in the order of between £700 to £1000. as opposed to £200 to £500 for a good reliable fix.
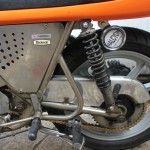
The wheel came back after3 days, the discs now needed to be refaced which I will do on our big lathe. They need to have a minimal amount of metal removed so as not to make them thin. One of the front break callipers has had its hydraulic line feed nipple broken in it. Careful and judicious drilling will remove it without disturbing the threads. The engine was put into its cradle and all bolts tightened up. Time to adjust rear chain. Hidden in the swing arm pivot bolt end are round cam plates with offset holes.
By turning the cam-plates, chain tension should be attained, if not, a different set of cam-plates will have to be used. There are several sets of these plates to choose from. Everything has now been completed and its time to start her up. The usual procedure is common for any four cylinder Honda but on this one, with no airbox, more choke will be needed until the engine has really warmed up, probably about one minute. The engine started first time and was incredibly quiet unlike the exhaust volume. One other very important matter to bare in mind is “never leave the petrol taps on when the Rickman is on its side stand. Standard side stands on the Rickman are on the short side, thus allowing the bike to lean alarmingly over, carb floats will not work effectively in shutting off fuel flow.
This is a list that we gave to the customer of the machine repairs.
Engine
- 1) Remove engine (Had to drill out 4 bolts). Full strip down and inspection to certain worn parts (Parts supplied by you) Hone barrel.
- 2) Repair stripped threads in cylinder head.
- 3) Helicoil 2 off plug threads (No 2 and No 3)
- 4) Manufacture 4 off engine mounting bolts.
- 5) Repair wire to oil pressure sensor and neutral gear.
- 6) Repair stripper thread in exhaust.
- 7) Repair stripped tread in cam shaft covers.
- 8) Repair stripped tread in cam shaft cover breather. vapour blast and poish cases and covers. Grind valves in ( 2 very worn) but very serviceable.
- 9) Supply oil to spec.
Wheel
- 10) Remove tyres, tubes , tapes and all fittings, shotblast wheel and paint grey silver.
- 11) Replace 2 off inner tubes (rear creased and surface fractured).
- 12) Manufacture rear wheel spacers as home made ones were fitted.
- 13) Remanufacture rear chain adjuster. fit link-less chain.
- 14) front wheel spindle ( repair damaged thread).
- 15) machine all disks (very rusty and pitted)
Breaks
- 16) Fix seized rear break calliper.
- 17) Remove front break calliper ( strip down and clean all parts, great difficulty in removing piston.
- 18) The 2 callipers had stripped bleed nipple threads. One calliper had stripped bleed thread. Modify bleed nipple thread to take oversize nipple (SPecial stainless insert made for one)
- 19) Remove and clean hydraulic lines( bad blockage ound on throttle side line). Strip down master cylinder and check master seals. Replace lever bolt for stainless steel. bleed front breakes.
- 20) Supply break fluid.
The customer picked up the bike and said he was going to pick it up and take it for 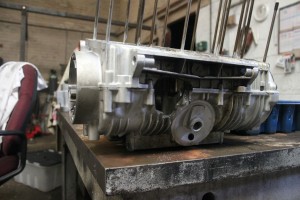 a ride to his home country of Wales next week. I said she will give you no problem as long as you turn your petrol tap off, if left on the side stand. Two weeks later I got a phone call saying the engine had catastrophically blow up leaving a large hole in the crank case, “what do you think has happened?” he asked, I said “take the oil tank cap off and tell me what you can smell”, “petrol” he replied. did you at any point leave the tap on
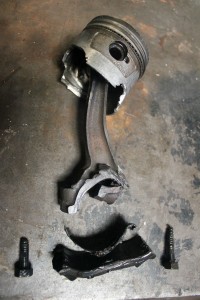 over night, “yes” he said.
Within no time he had provided two pairs of cases and a knackered rusty crank equipment with con rods and some just as bad and grotty barrels. I didn’t really want to rebuild her until my mate Colin said “I have got a new crank with rods fitted. “so here we go”, the rebuild of a rebuild is on. The cases were parted and the crankshaft was removed and the remnants of a conrod were found.
The crank was actually bent, first time I have ever seen this in any 4 cylinder. The barrel he provided had one good liner so we pressed it out and fitted it to the old barrel and then we honed the surface rust from it. It was as good as new. After a massive blow up it is a good idea to check that the valves are sealing. Only one exhaust valve was bent, Colin had a fine used one with no ware on the stem. A pressure test on the head showed great sealing qualities. No other damage was found. I thought it a good idea to replace the timing chain that had stretched beyond belief. A new gasket set was fitted that was delivered in lightning time by david silver spares. Within 4 days of strip down she was as good as new.
Picture

